The PurrfectBackup PRO model features a built-in M.2 slot for high-speed storage expansion. Follow this step-by-step guide to correctly install an NVMe SSD along with its custom cooling heatsink in your newly purchased PurrfectBackup PRO

⚠️ CRITICAL SAFETY NOTICE: Before starting, ensure your PurrfectBackup PRO is completely powered off and disconnected from any power outlets, computers, or cables. Working on a live electronic device can cause permanent hardware damage or electrical shock.
Required Tools and Supplied Parts
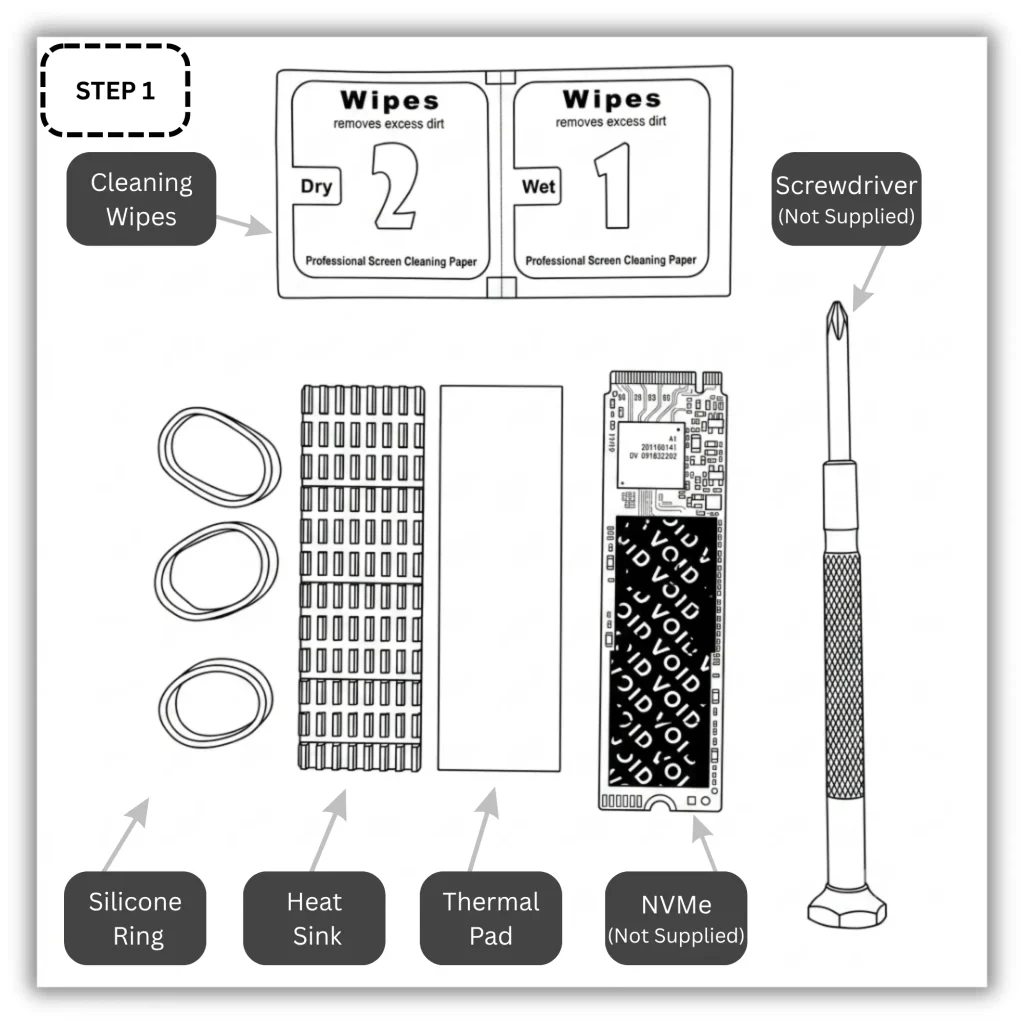
To complete this installation, you will need a standard #1 or #2 Phillips-head screwdriver
This tool is required to open the outer casing and secure the internal mounting screw.
Step 1 – Ensure all parts ready
Before you begin, ensure you have all the necessary parts included with your PRO model package:
Aluminum heatsink
Thermal pad
3 Silicone tension bands
Cleaning wipes
Small silver mounting screw
Prep the Heatsink and NVMe
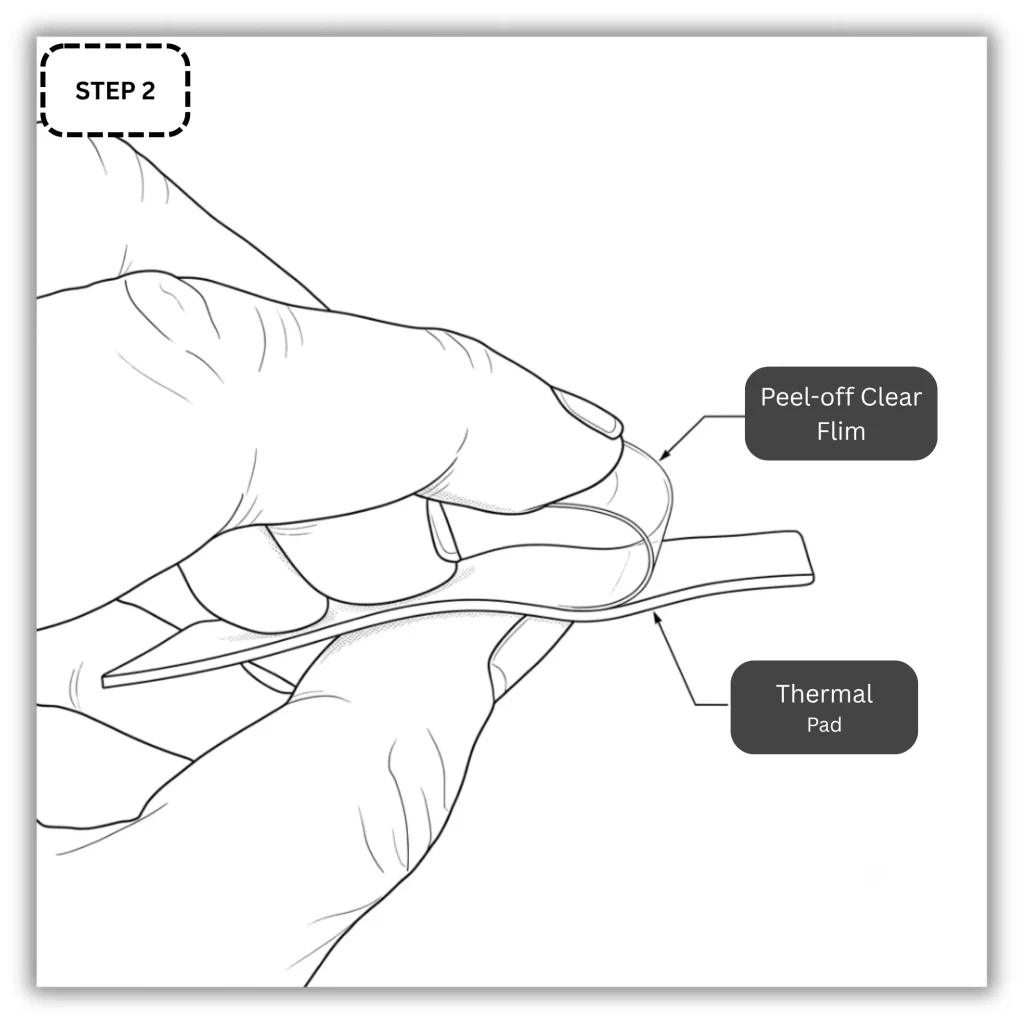
Step 2 – Remove the protective plastic film
Remove the protective plastic film from one side of the supplied thermal pad
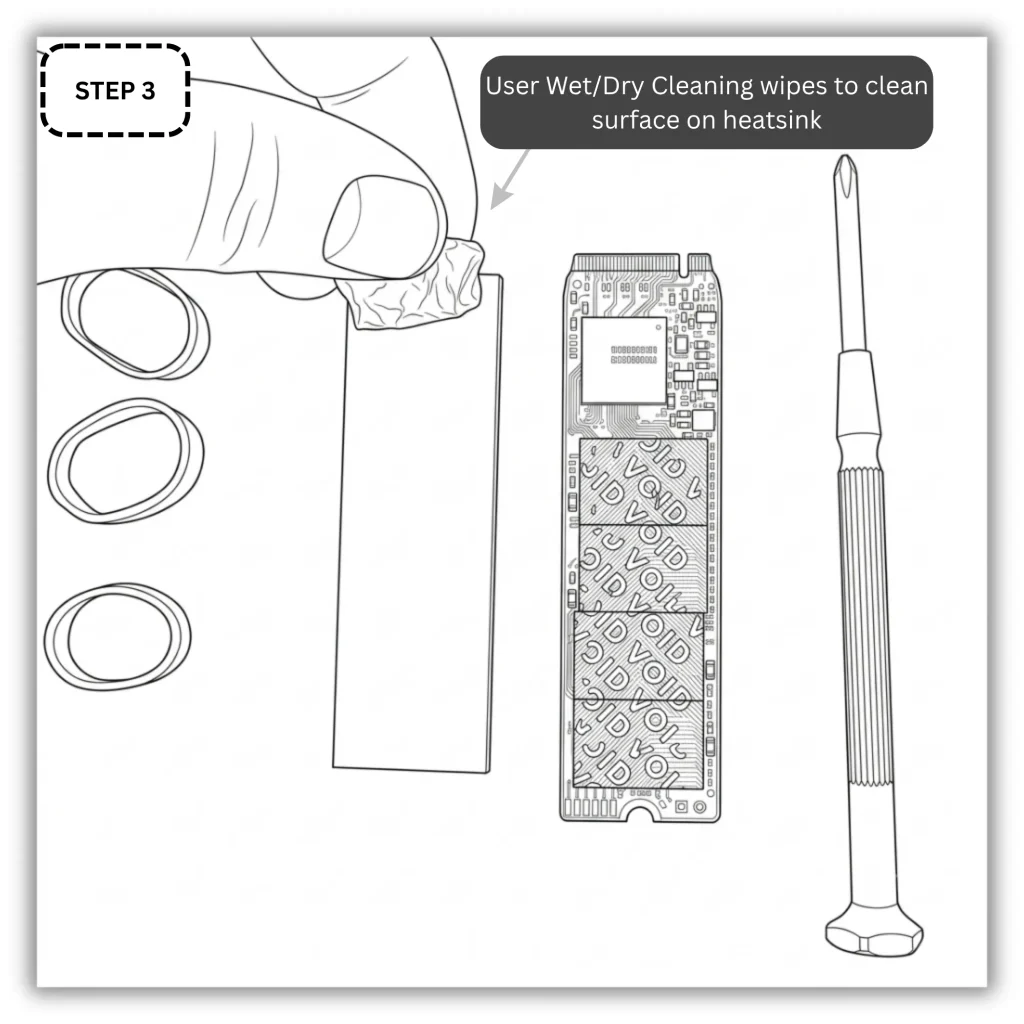
Step 3 – Clean heatsink
Use included wet and dry wipes to clean surface of aluminum heatsink
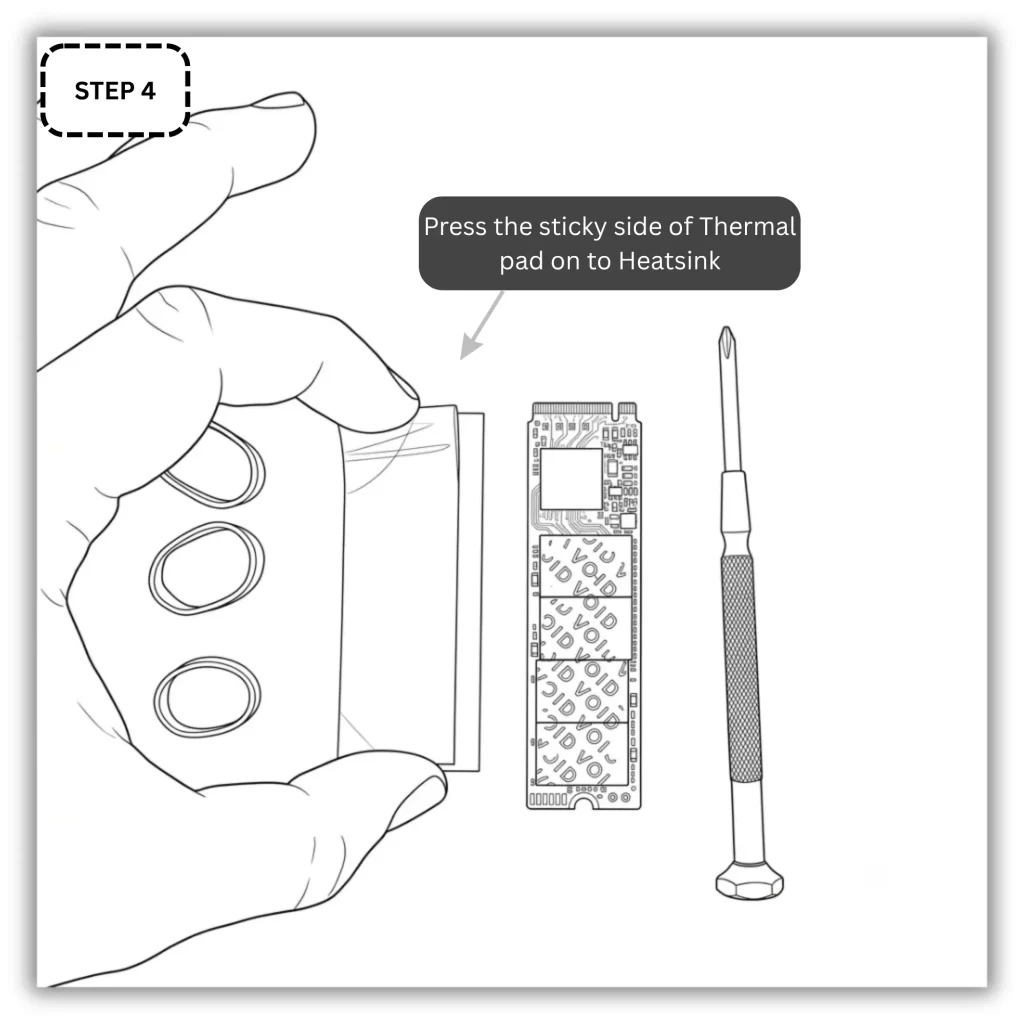
Step 4 – Stick Thermal pad to heatsink
Press the exposed sticky side firmly onto the bottom of heat sink
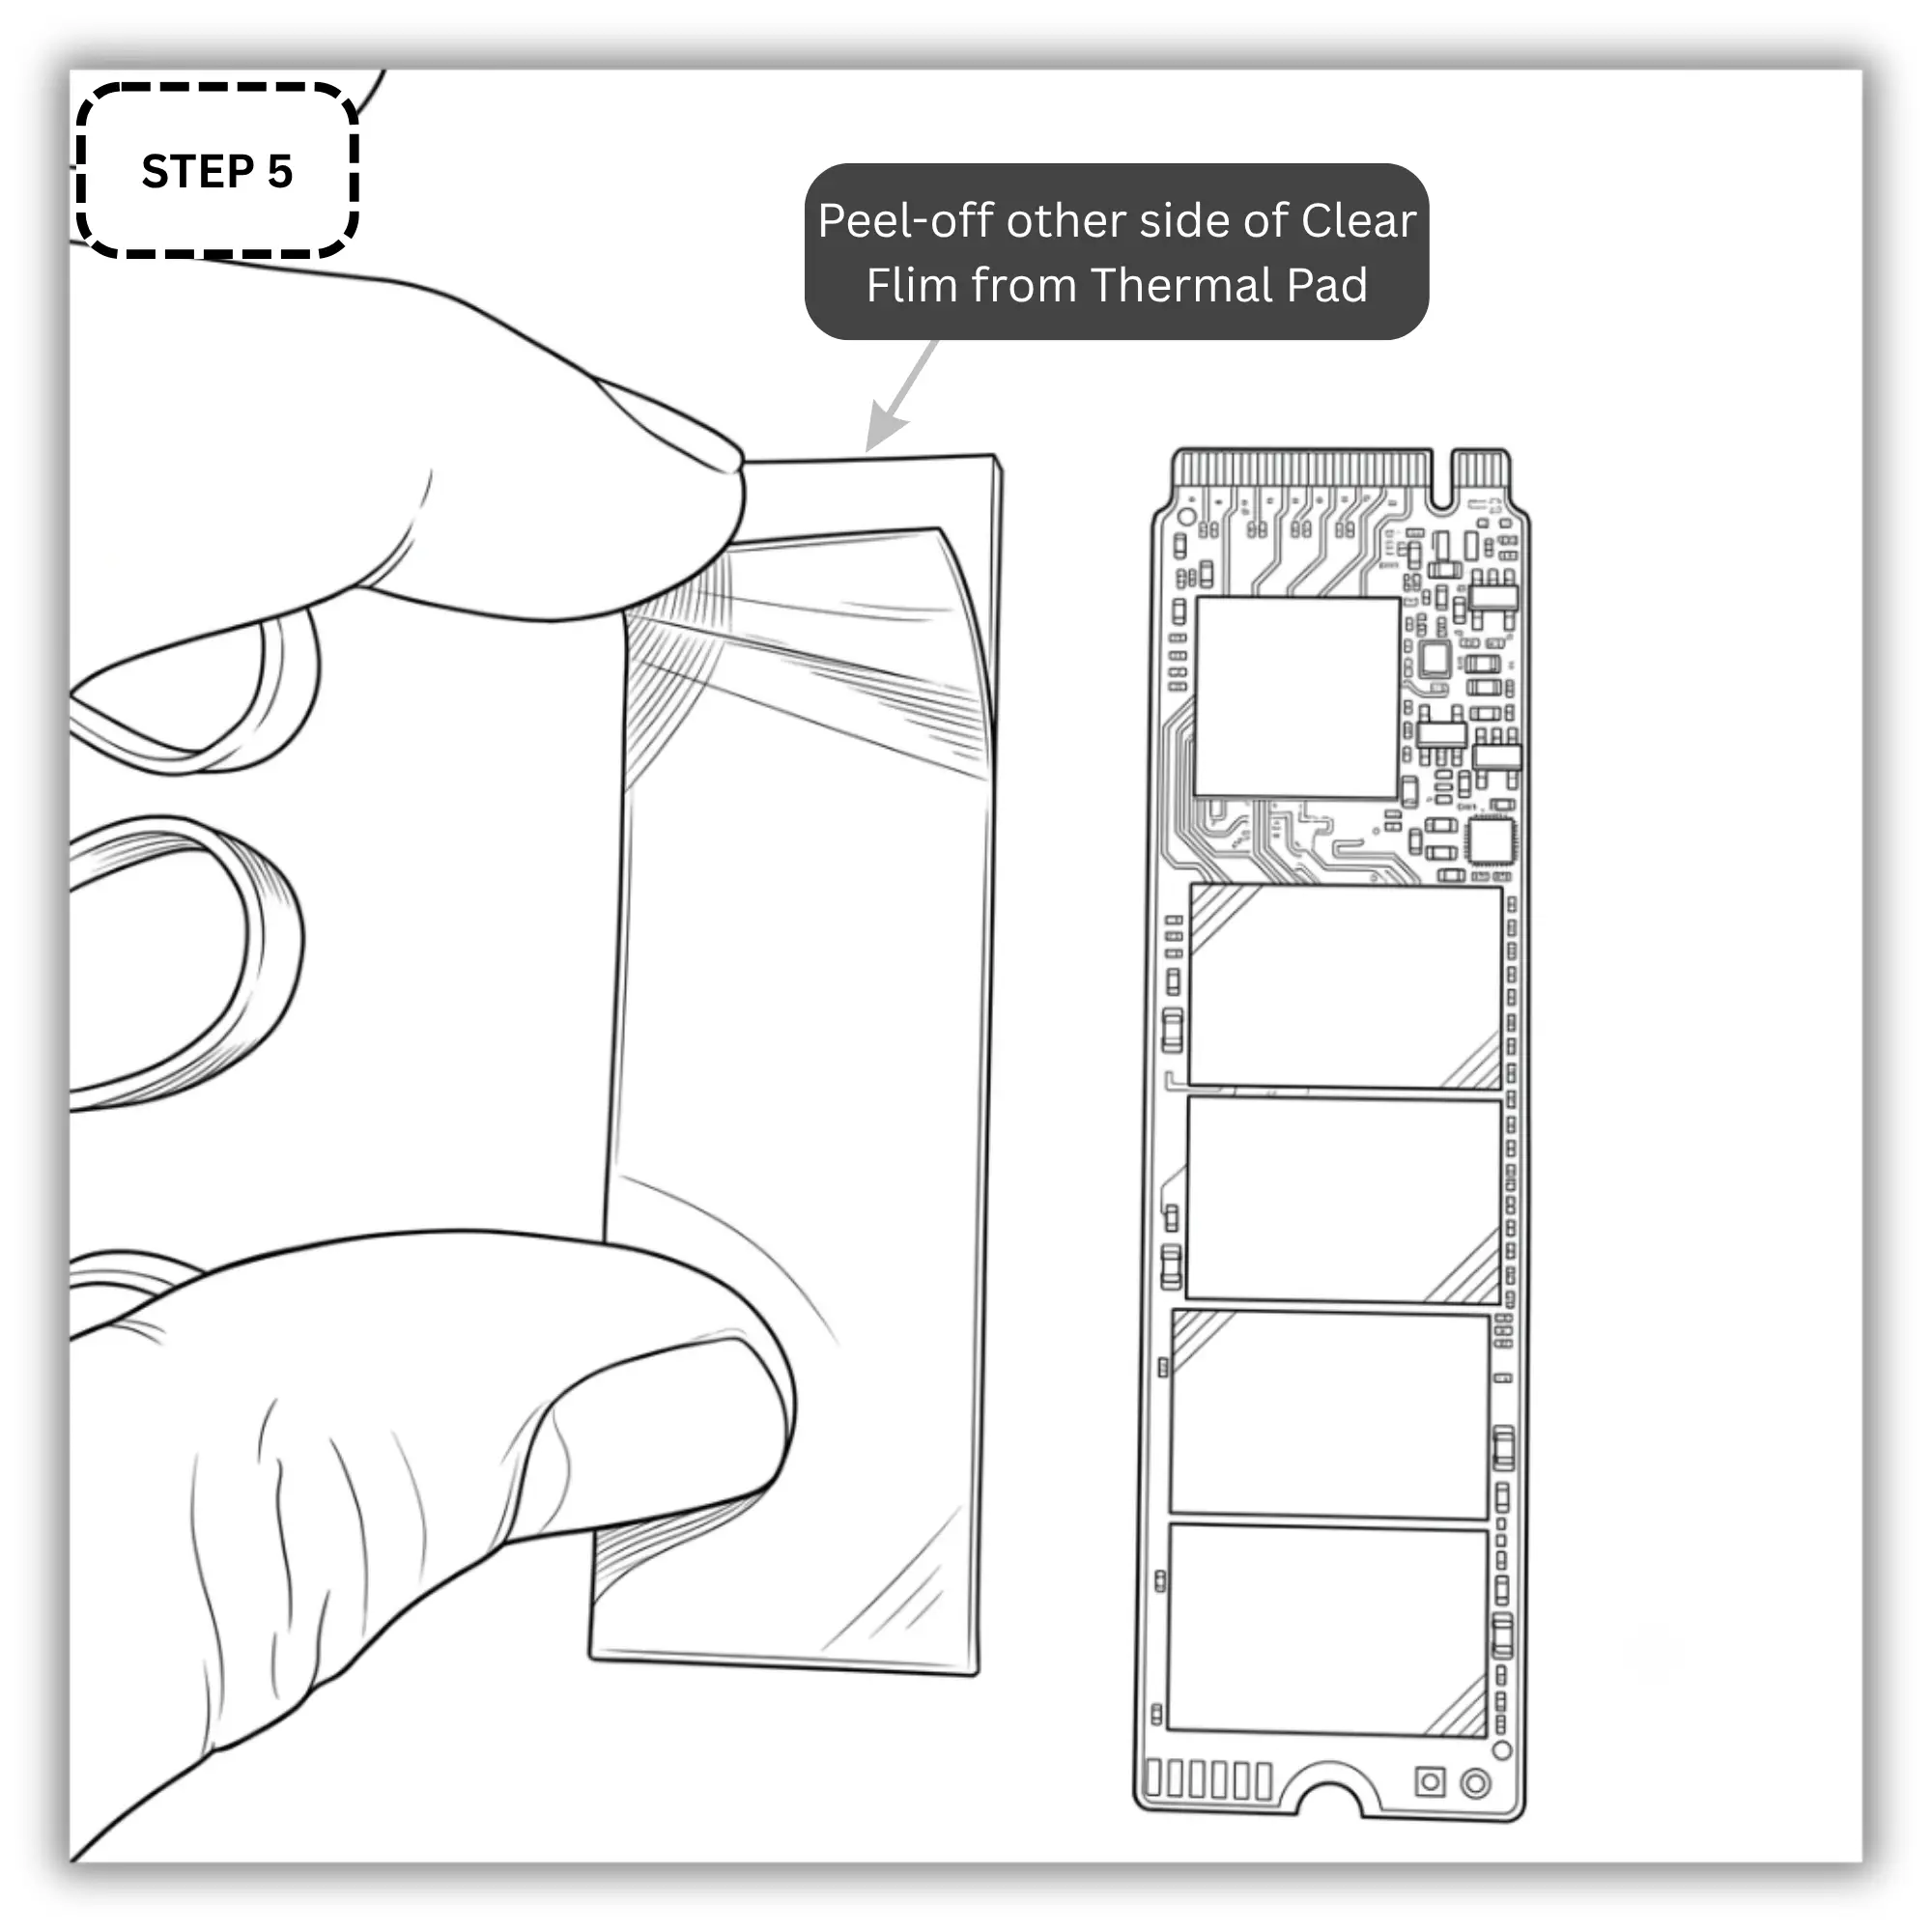
Step 5 – Remove 2nd protective plastic film
Remove the remaining plastic film from the top of the thermal pad
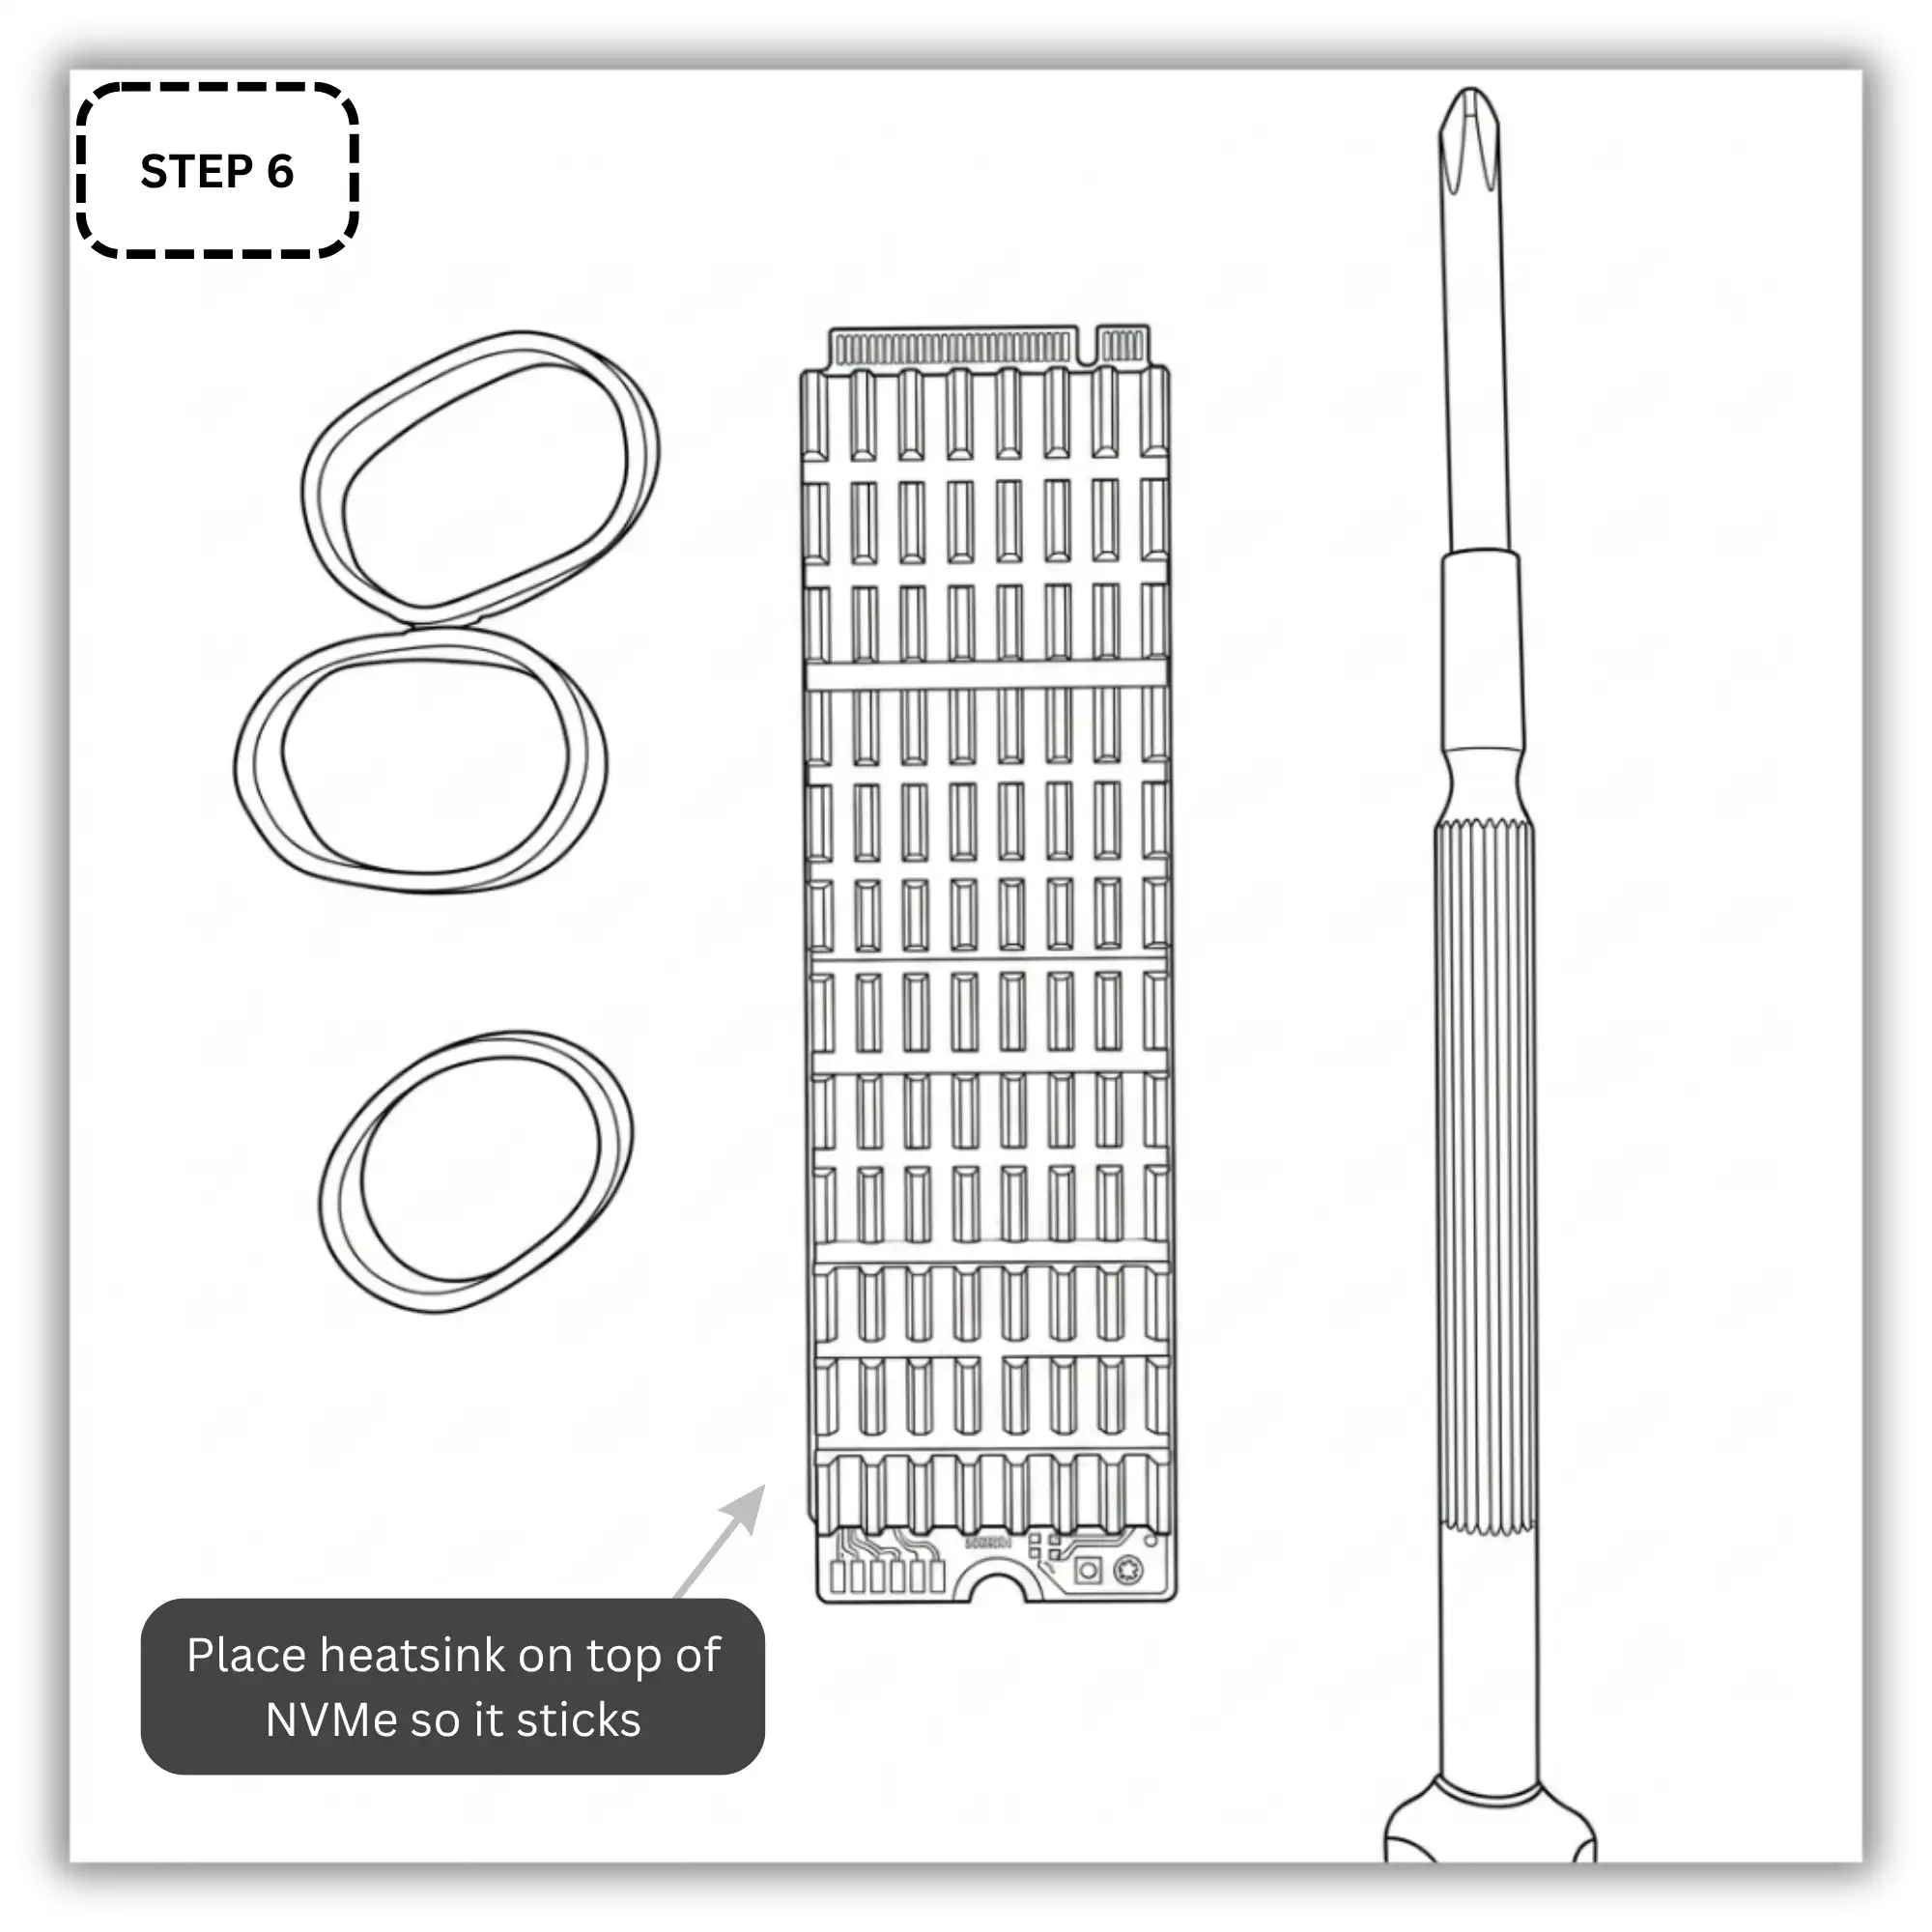
Step 6 – Attach heatsink to NVMe
Place the sticky part of thermal pad on NVME, so as not to cover pins and holes
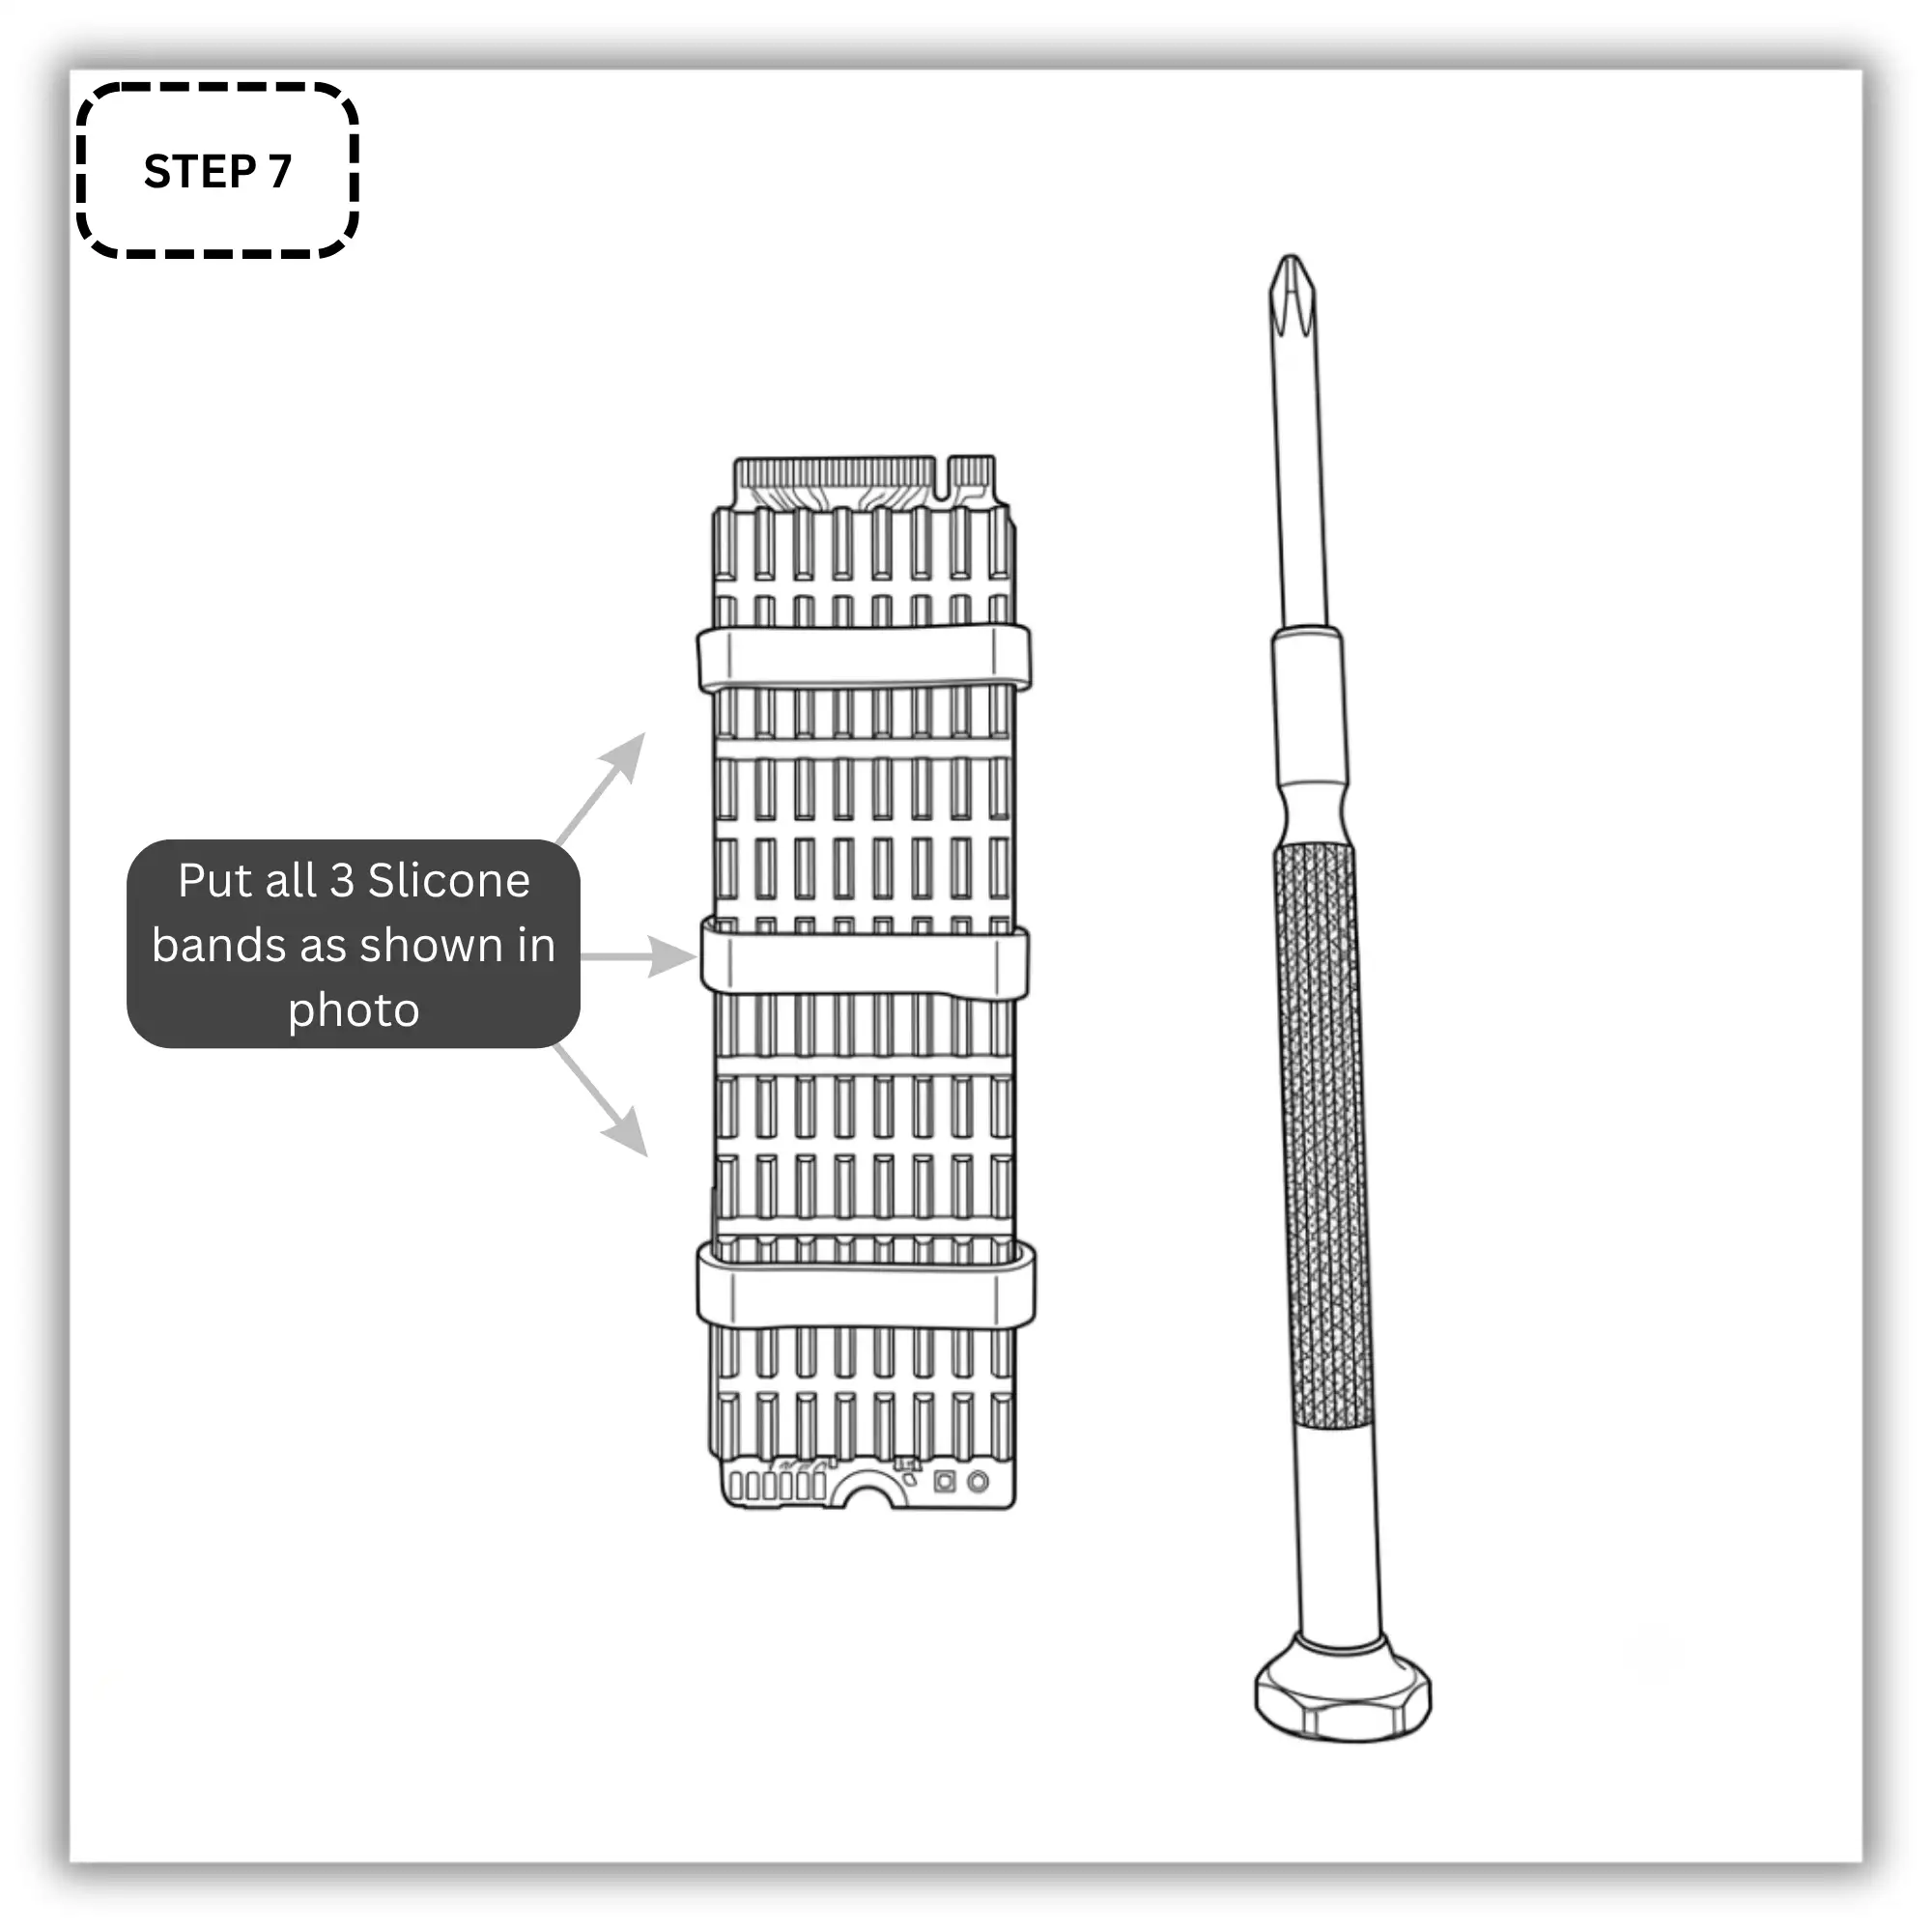
Step 7 – Attach three silicone bands
Slide the three silicone bands over the combined assembly – positioning one on each end and one in the middle – to clamp the heatsink tightly to the drive.
Now that your cooling assembly is ready, it is time to mount the hardware
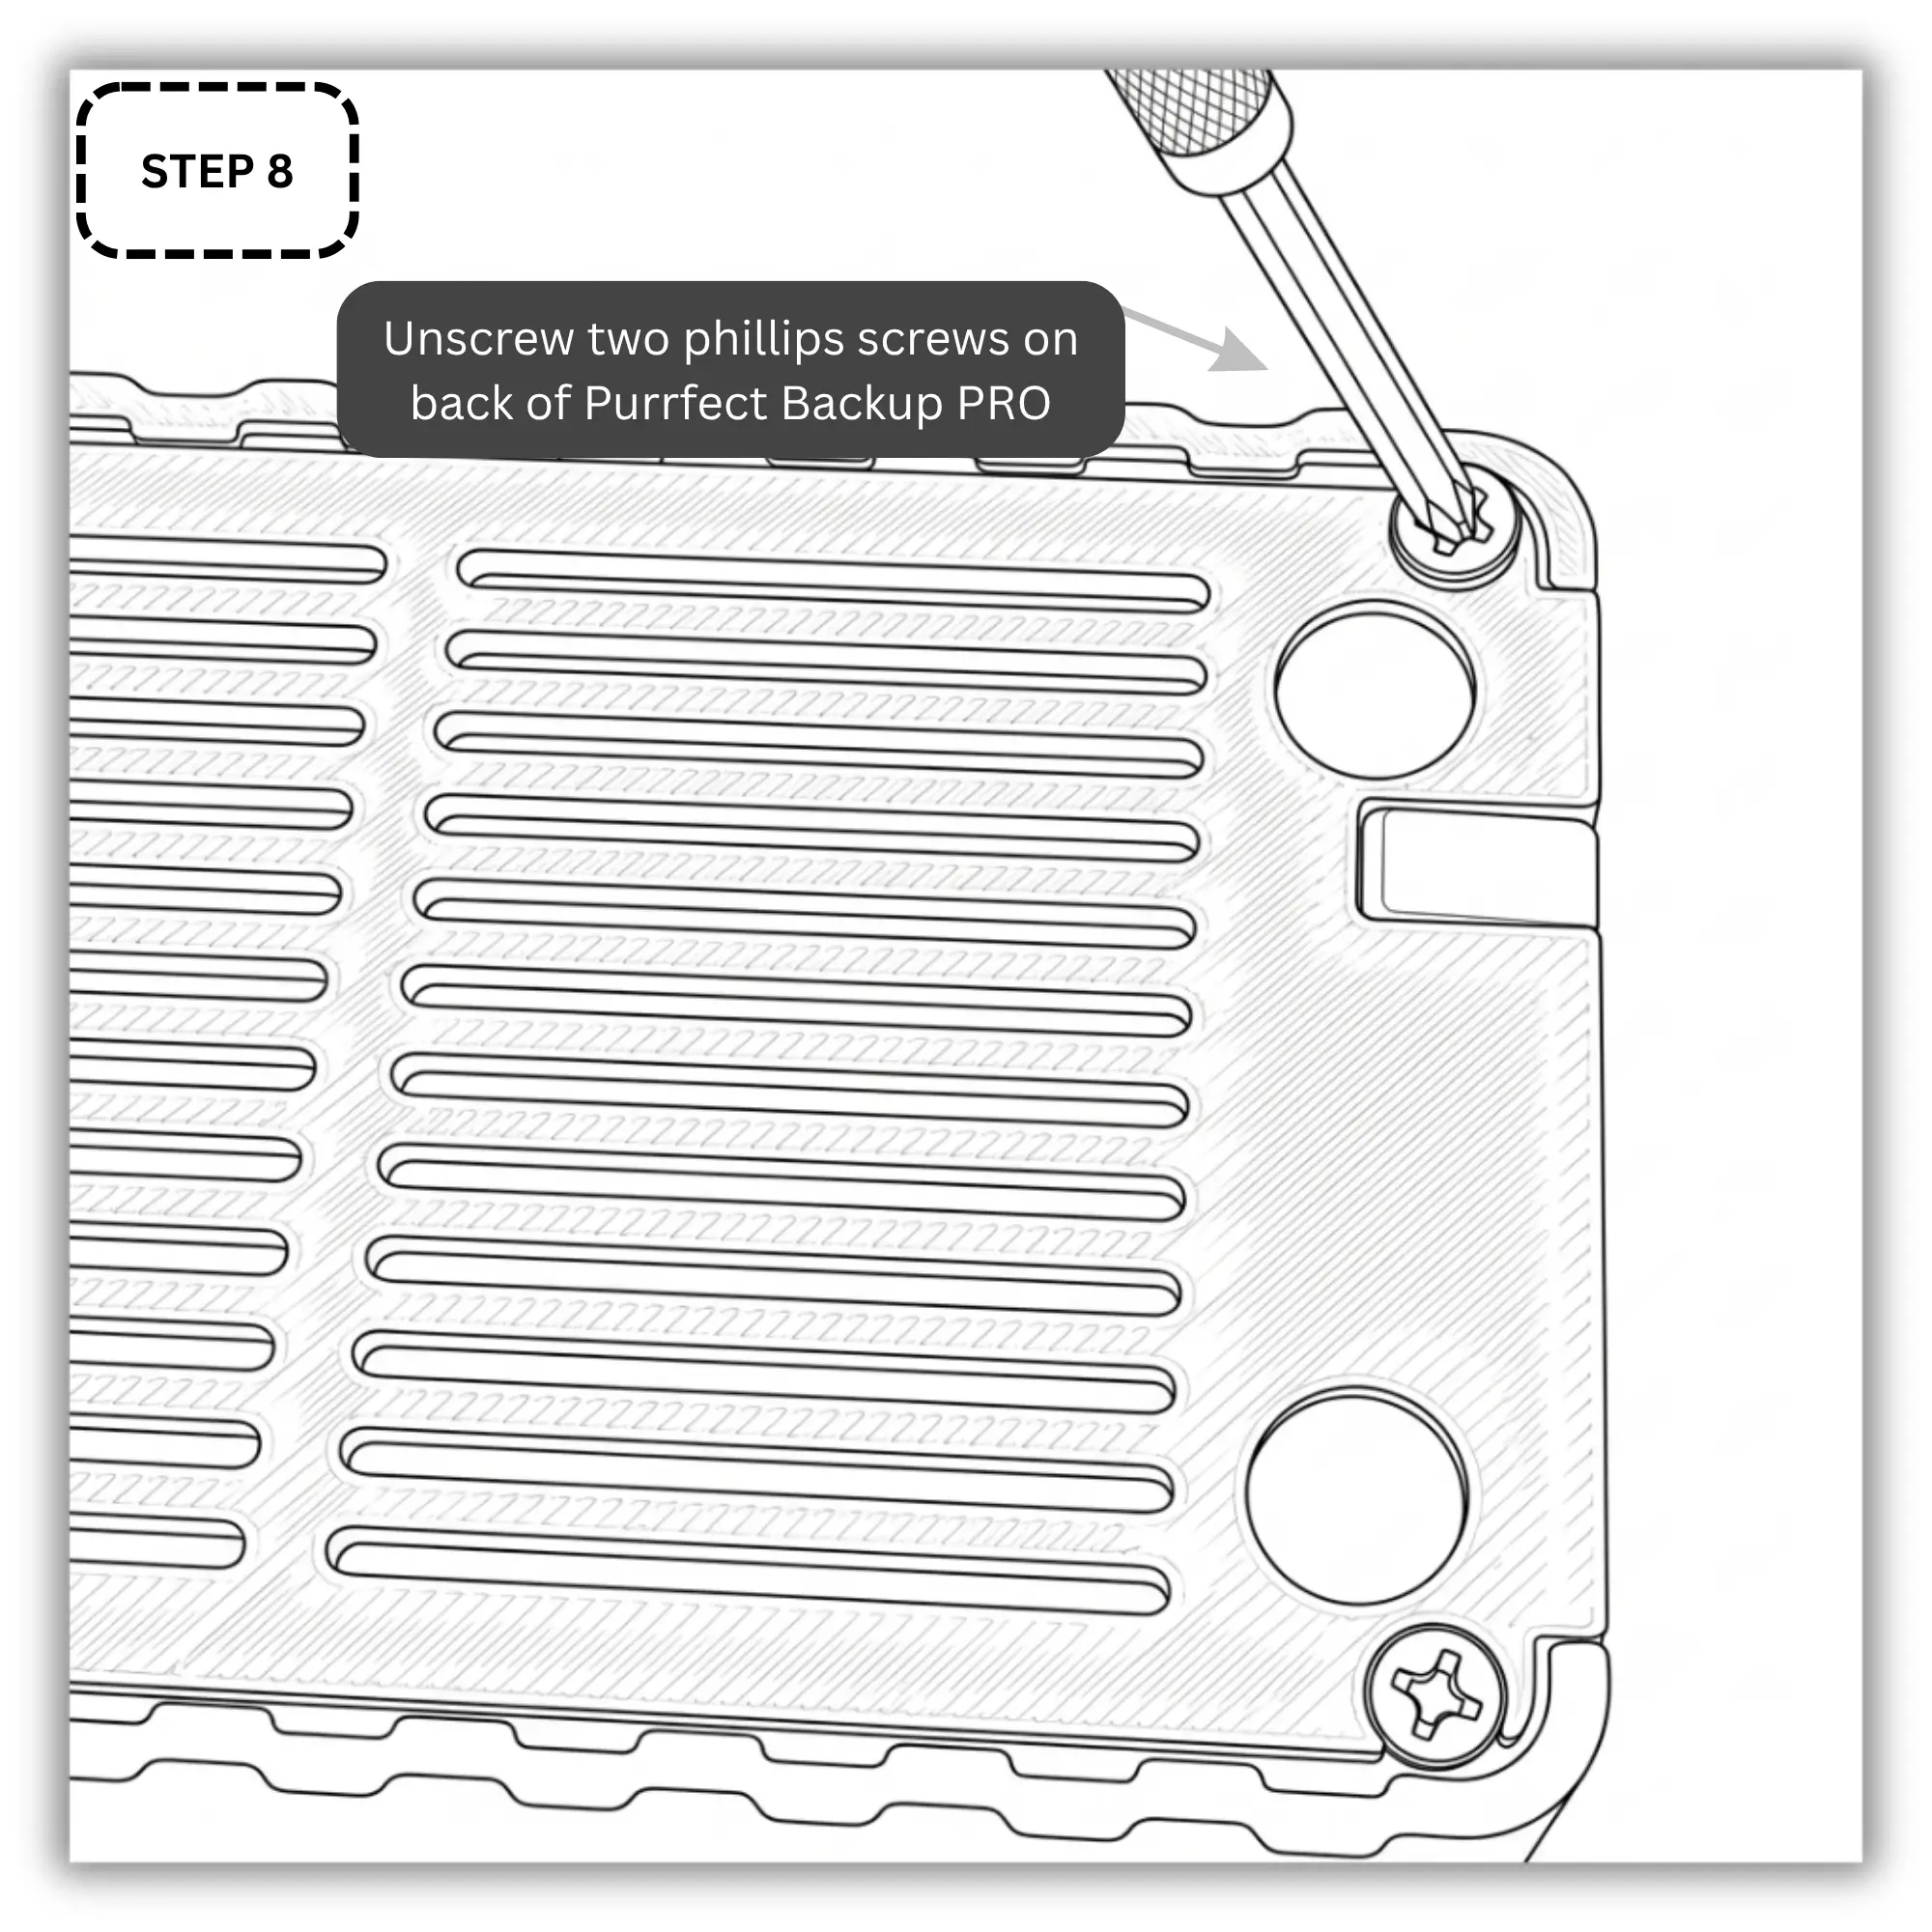
Step 8 – Remove screws from PurrfectBackup
To gain access to the internal storage expansion slot, you must remove the outer casing.
Turn over the PurrfectBackup PRO enclosure and locate the two Phillips-head screws at the back of the device. Unscrew both screws completely
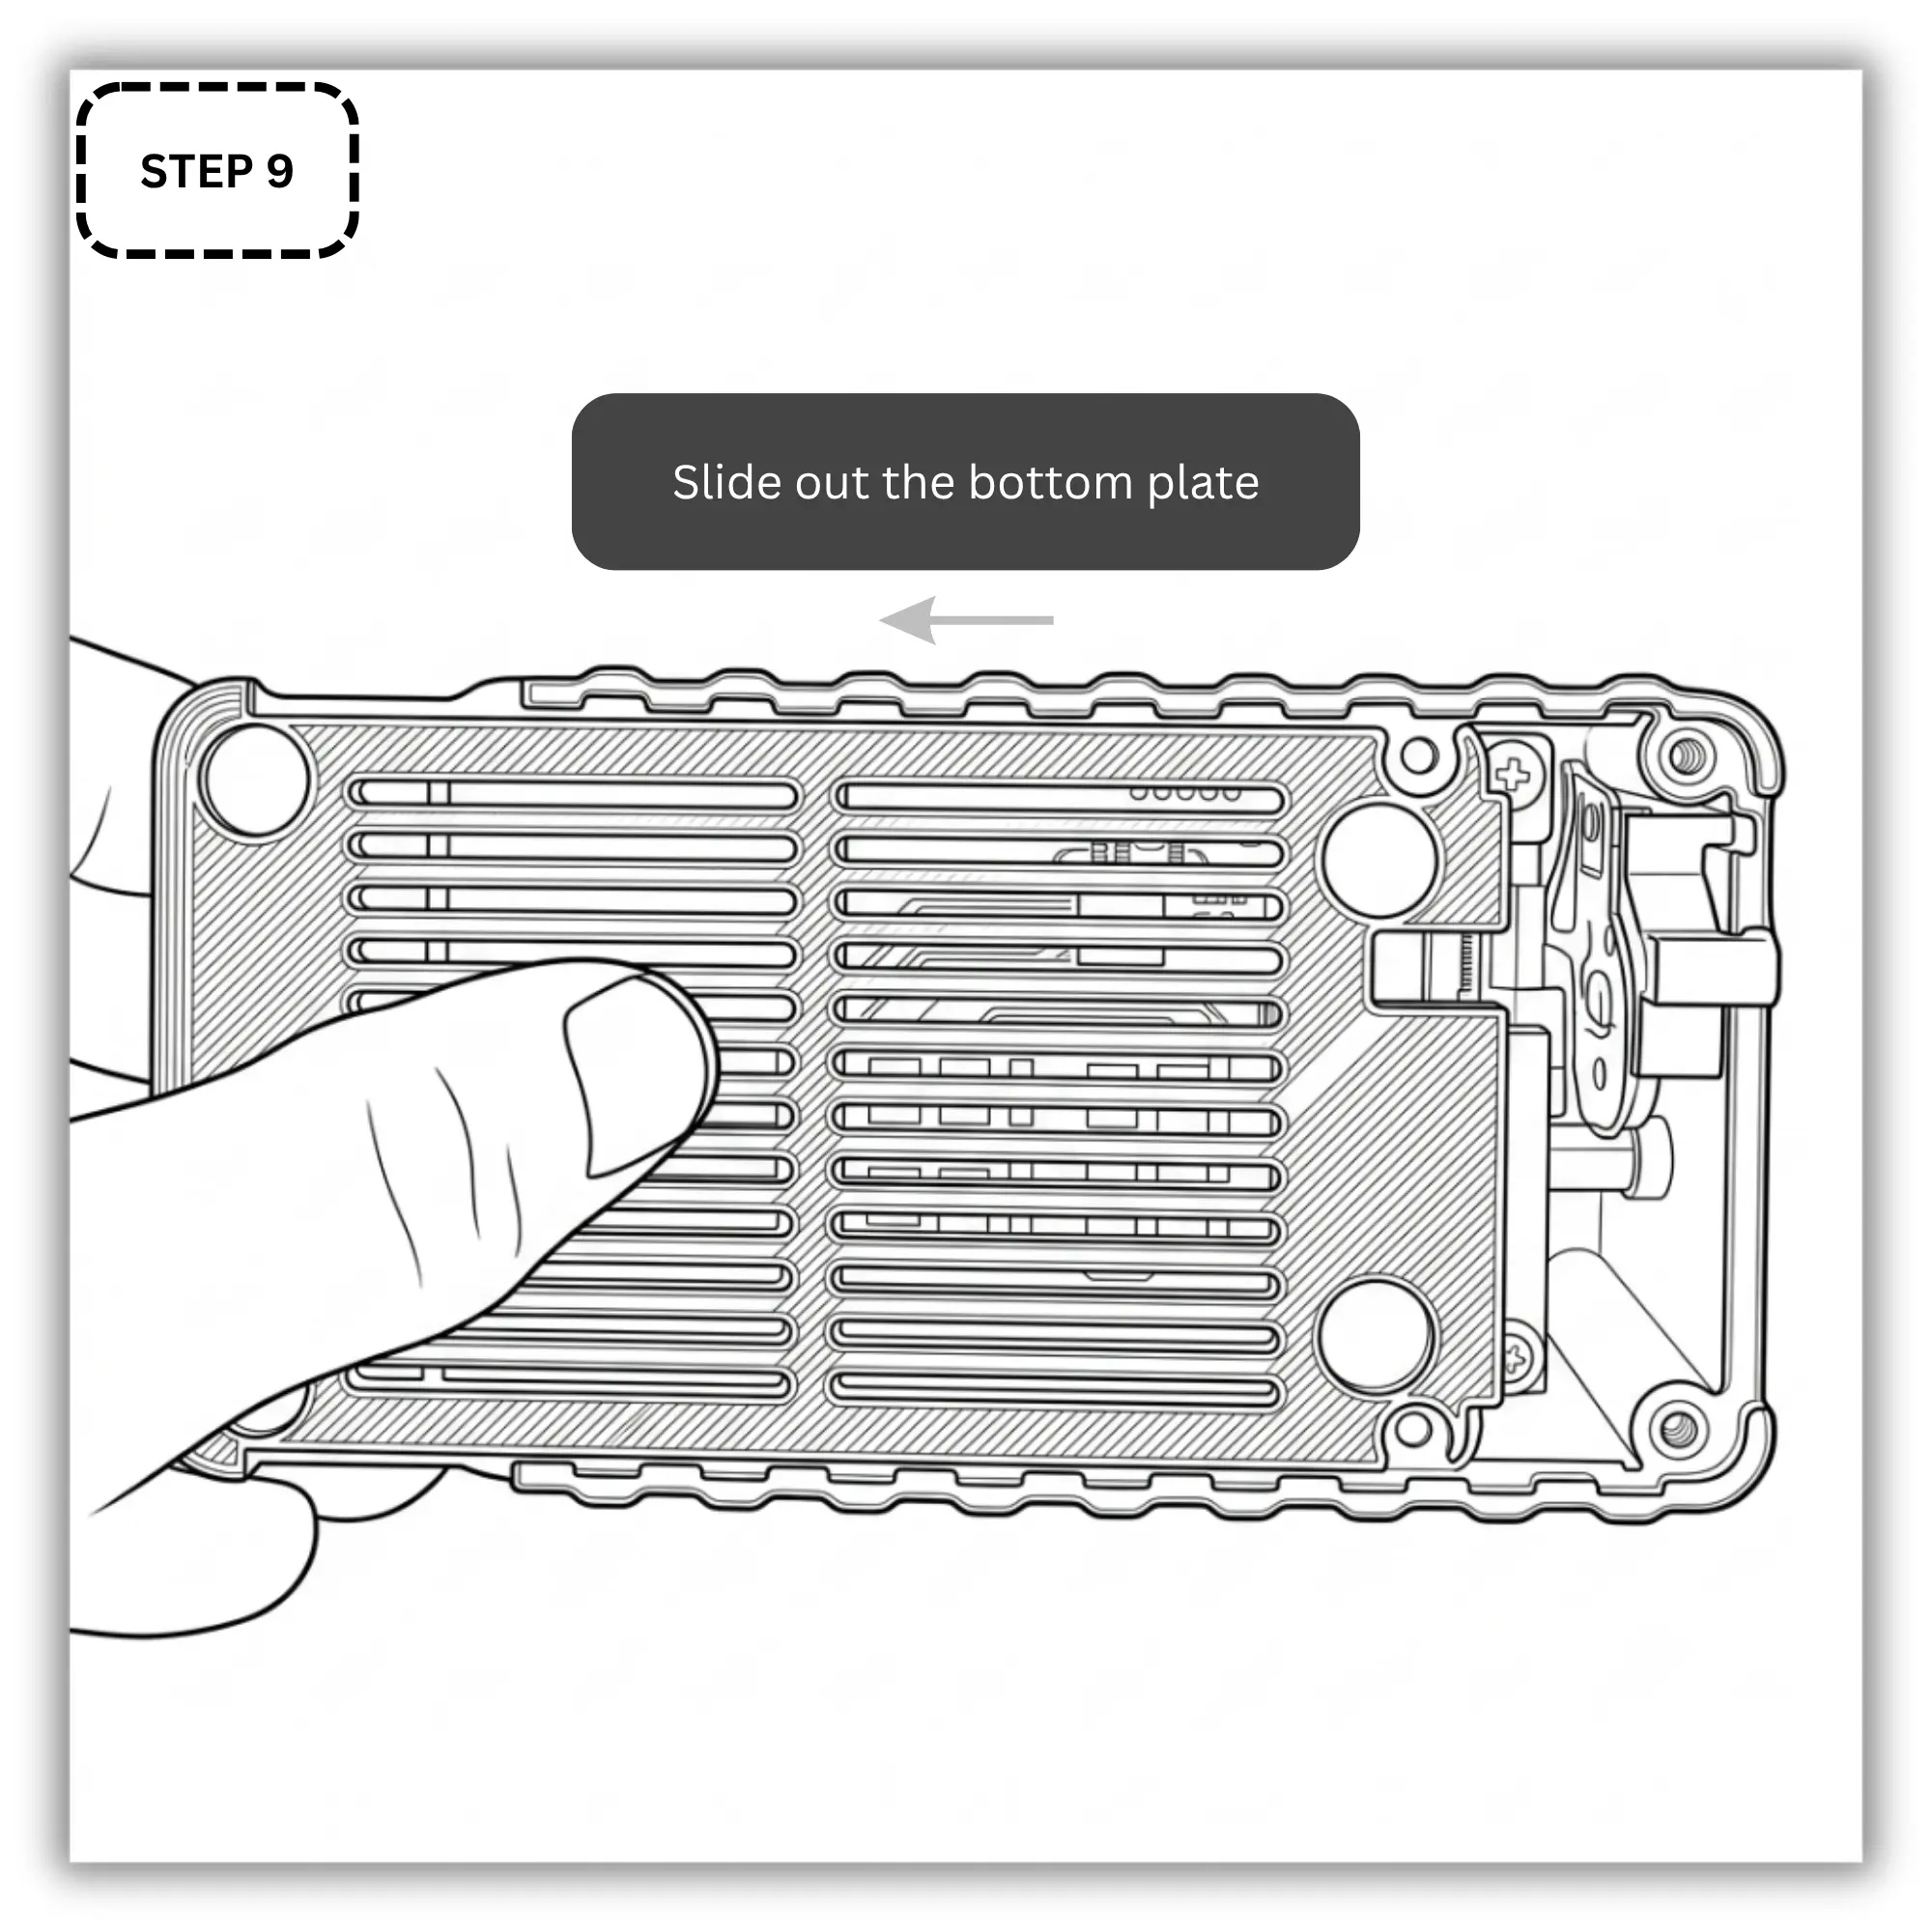
Step 9 – Slide out bottm plate
Slide out the bottom plate to reveal the internal NVMe slot.
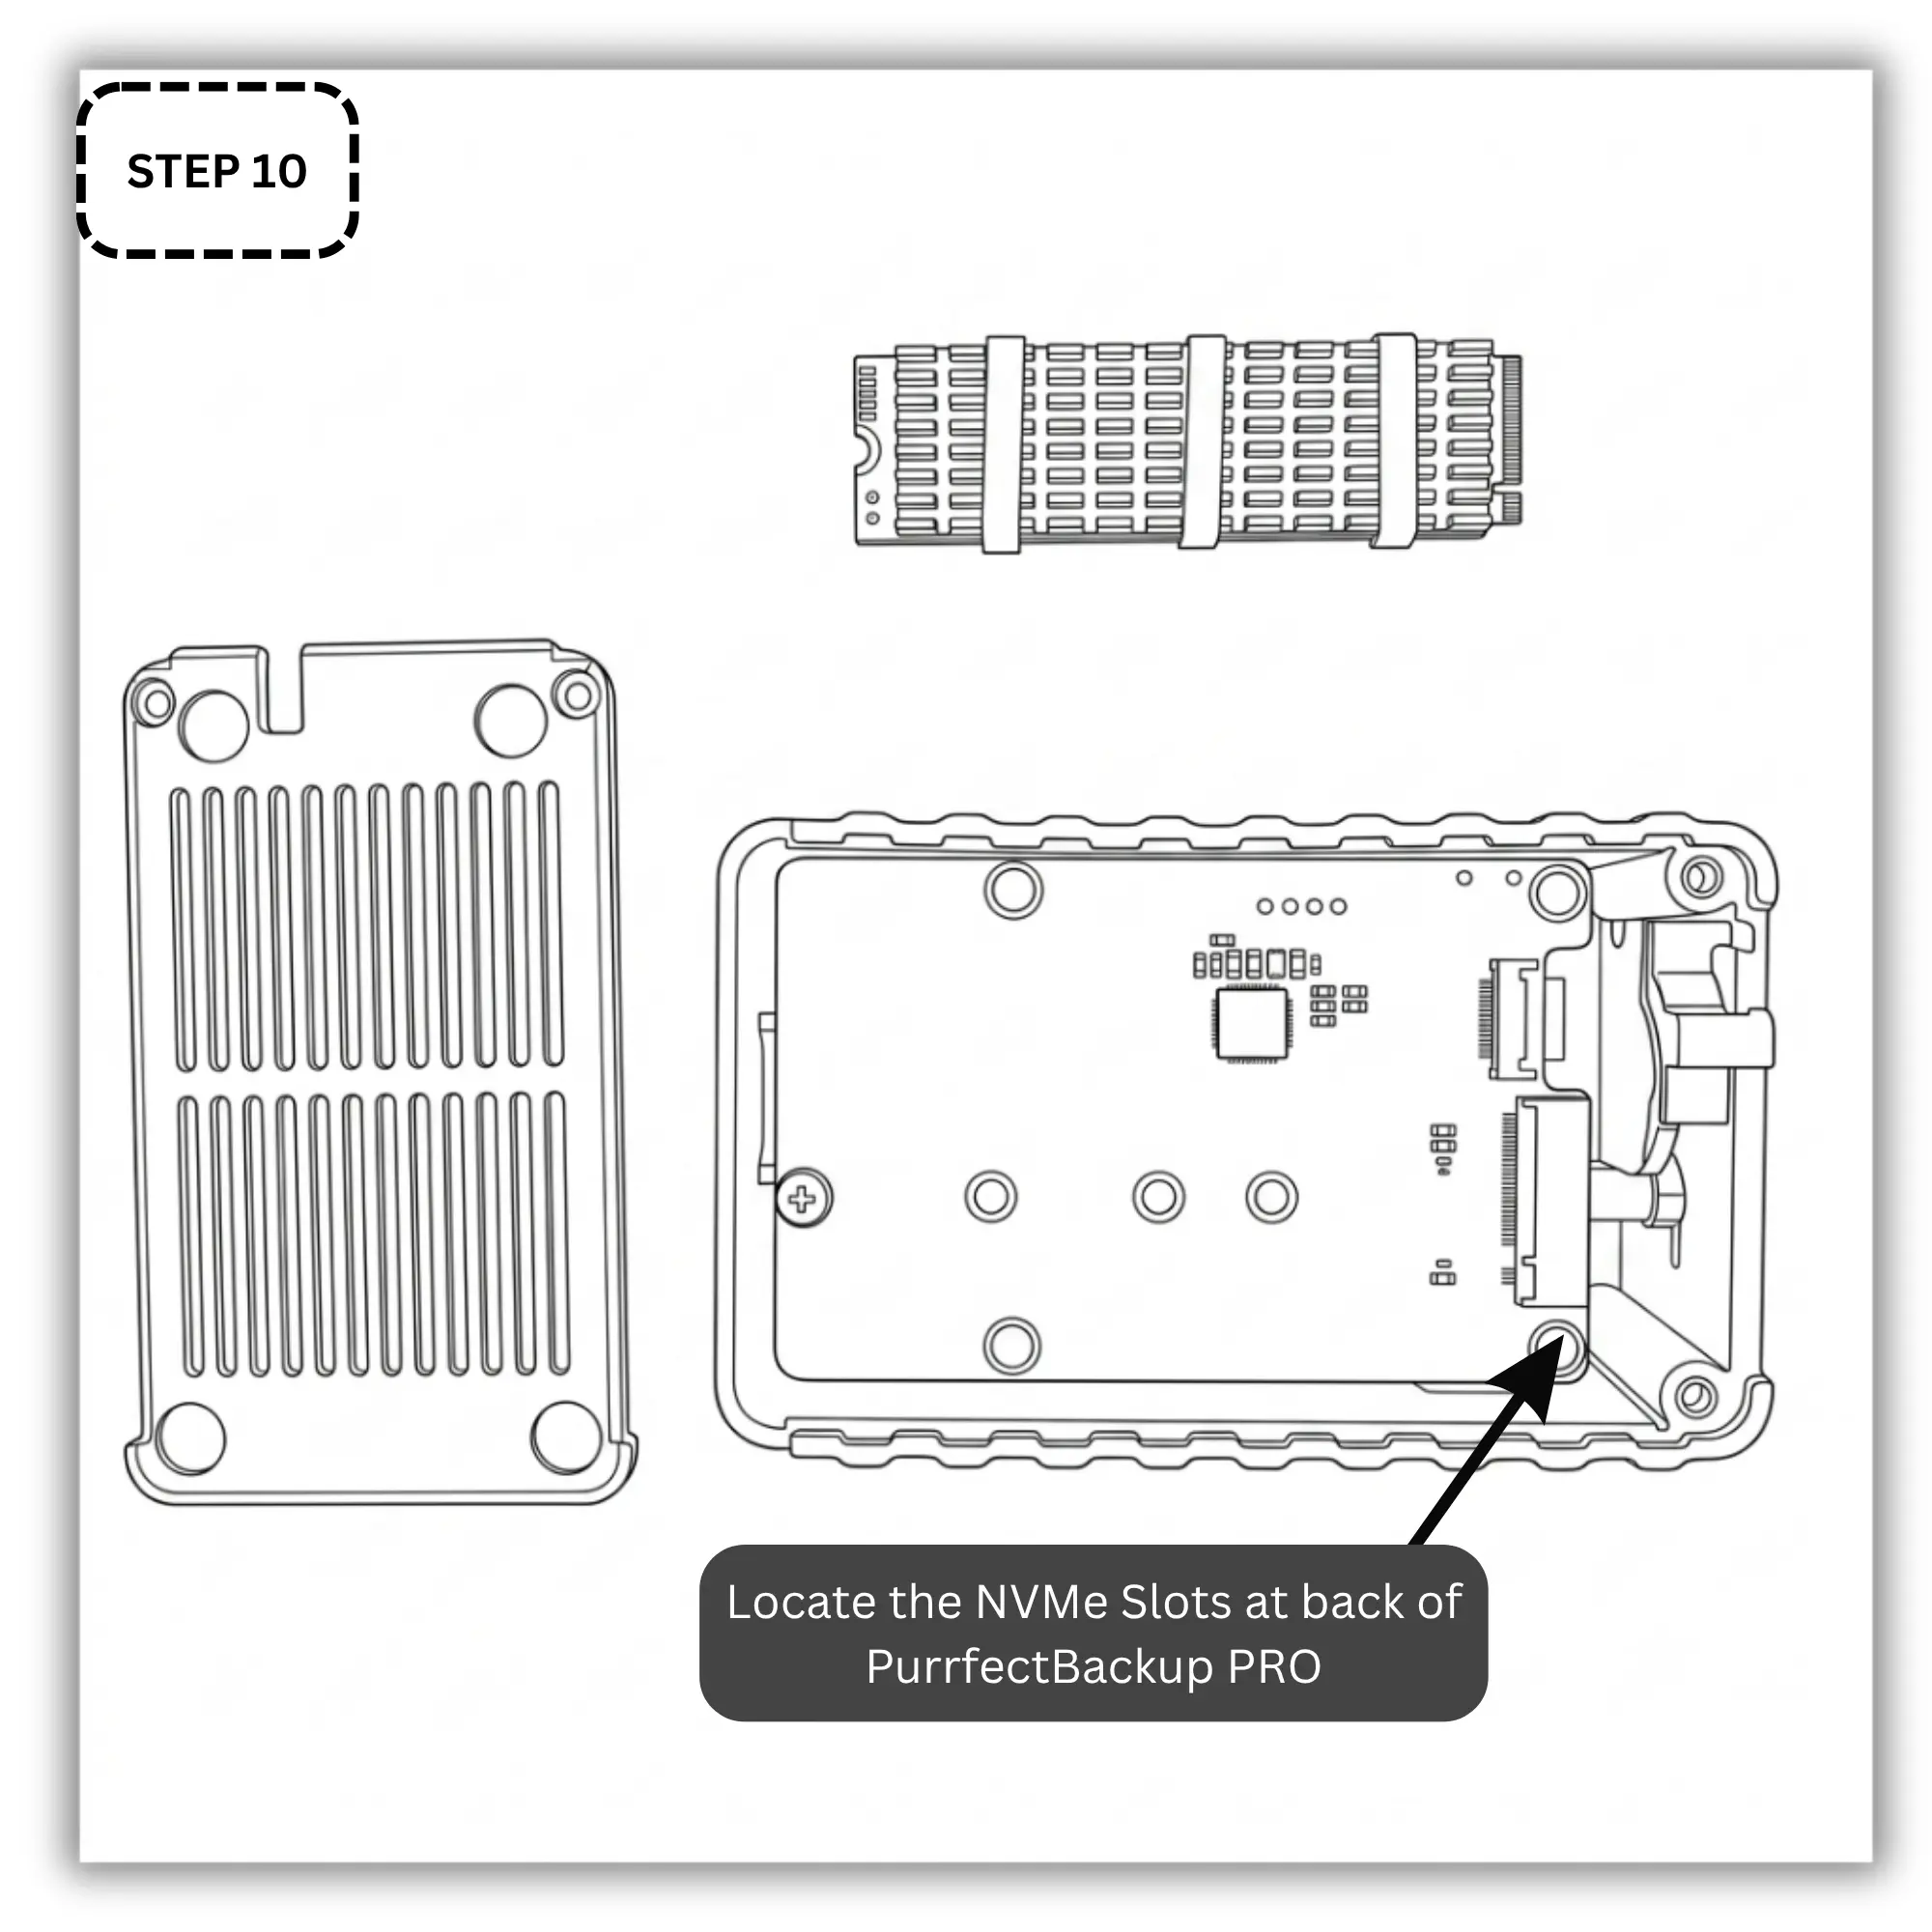
Step 10 – Locate M.2 Slot
Locate the Internal NVMe slot at back of PurrfectBackup PRO
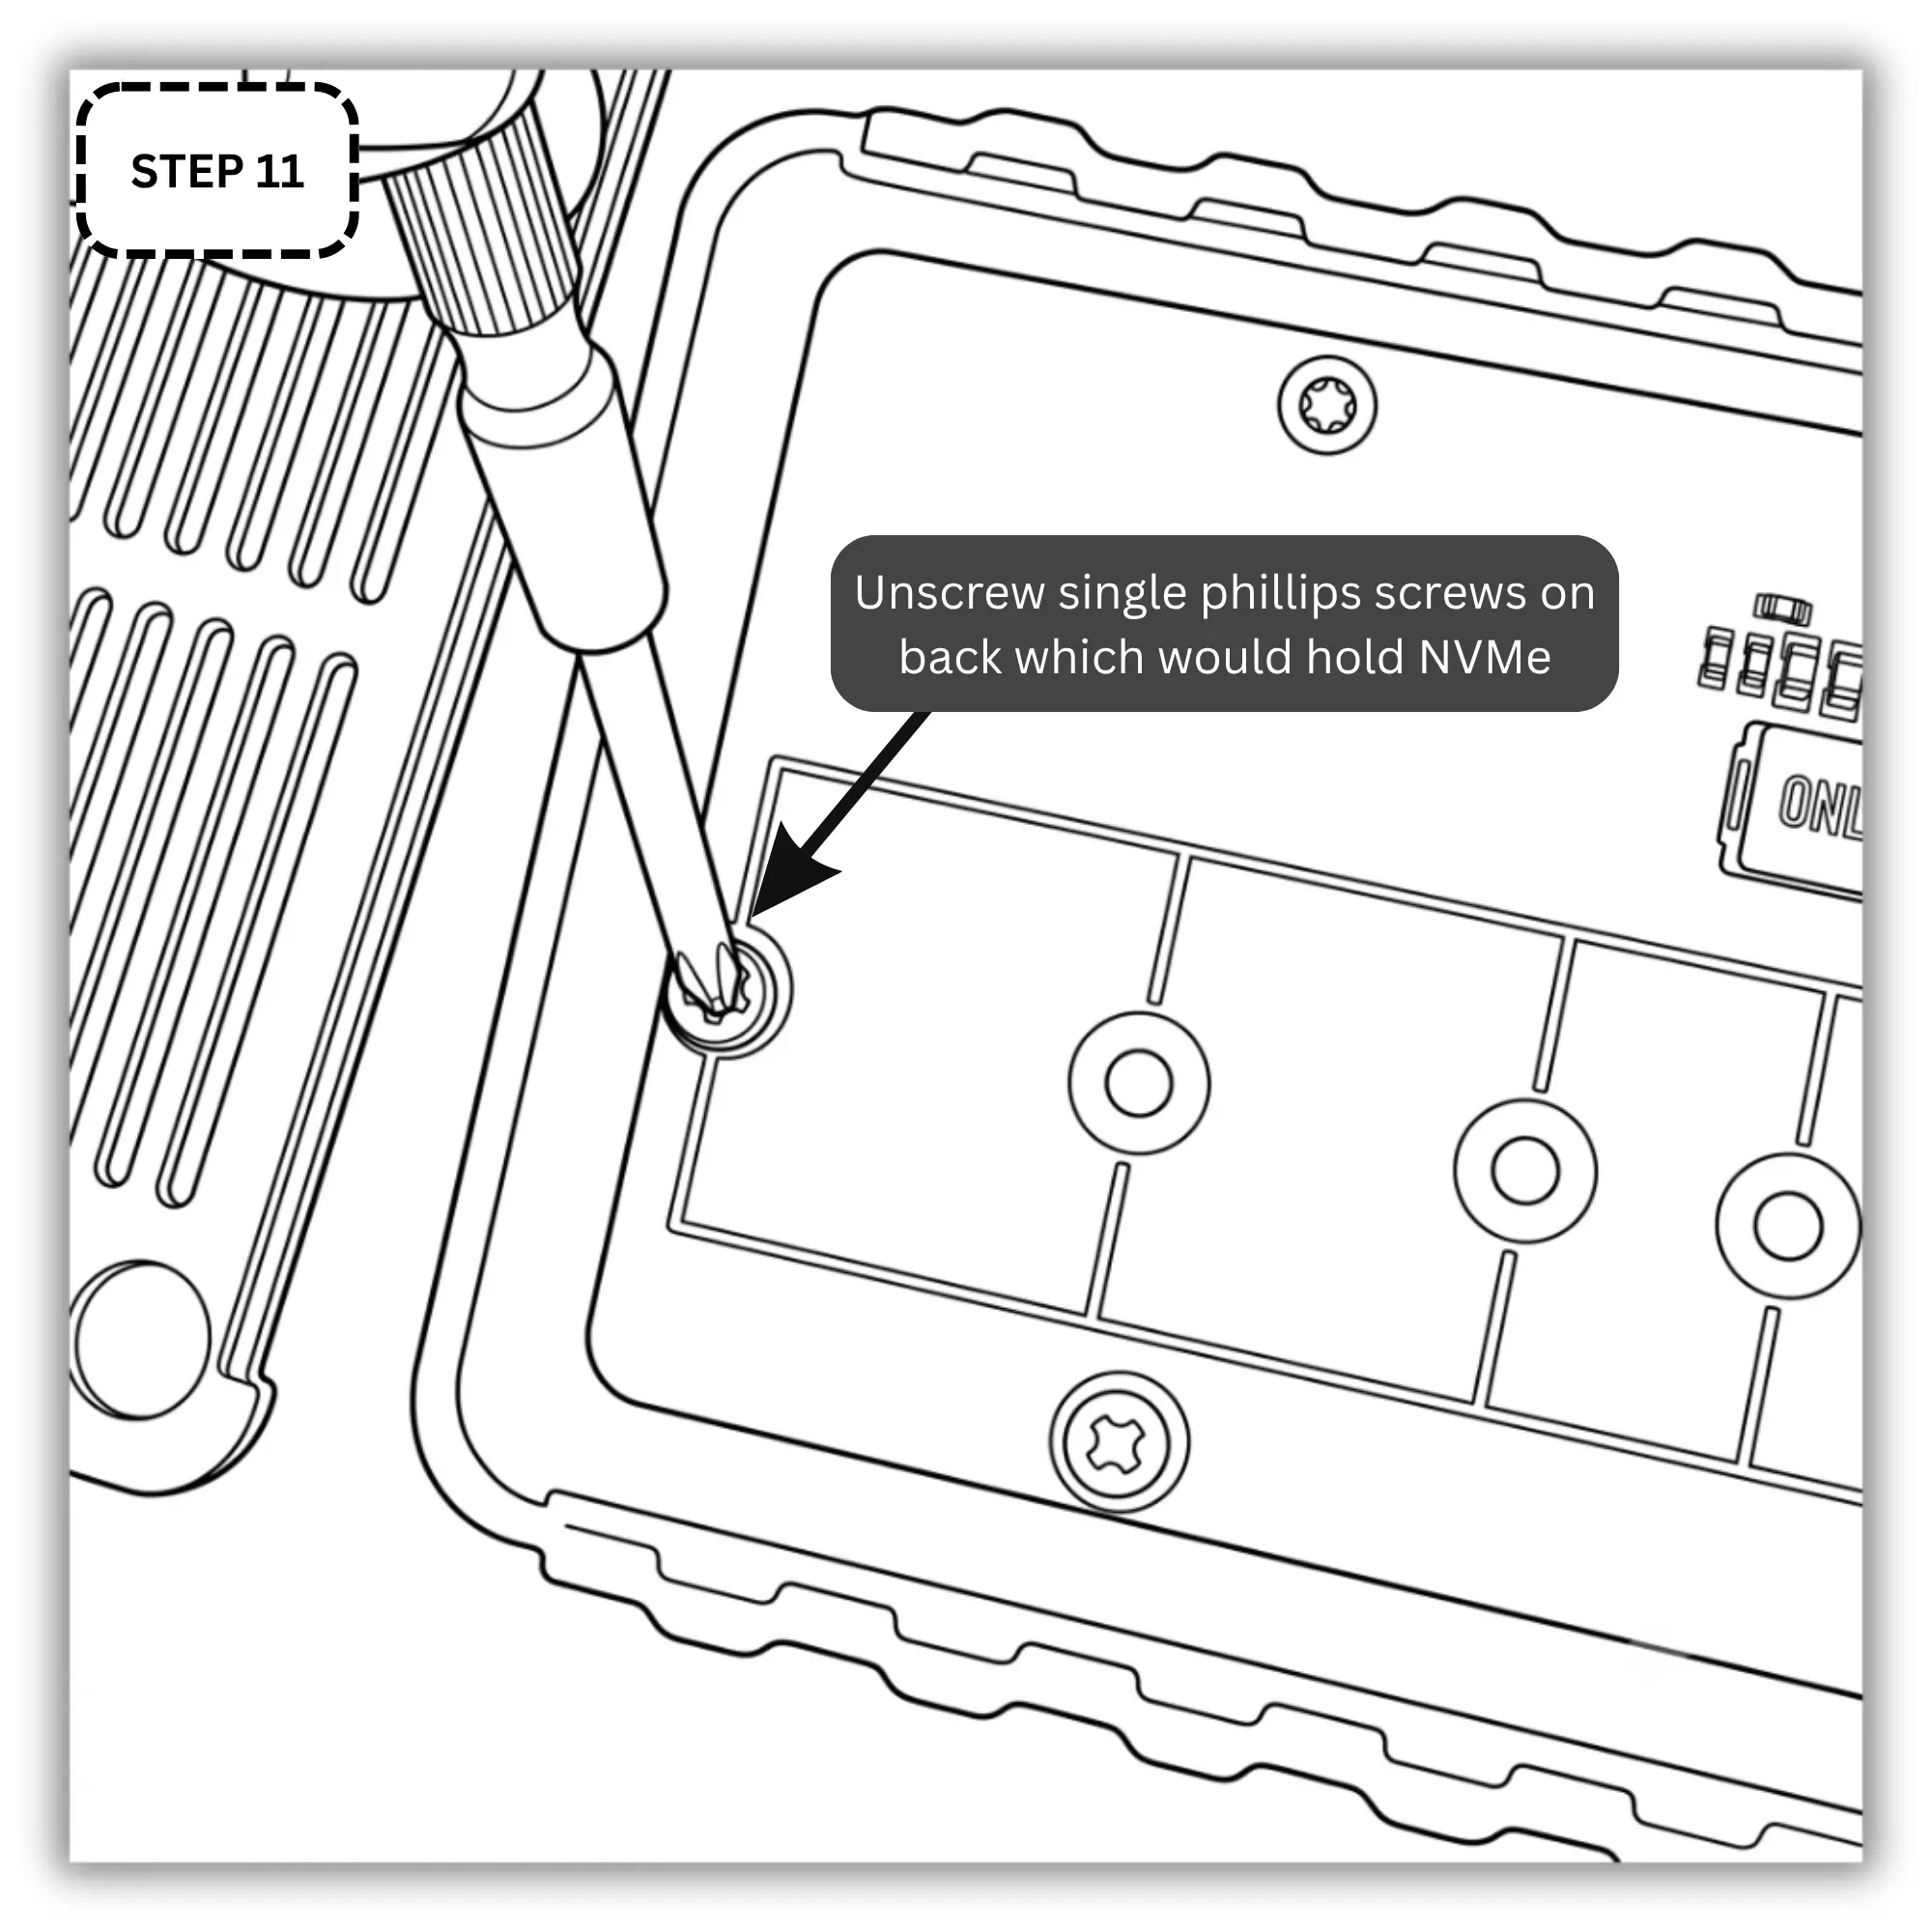
Step 11 – Retrieve M.2 standoff screw
Unscrew the NVMe standoff from back, this would hold your NVMe drive in place
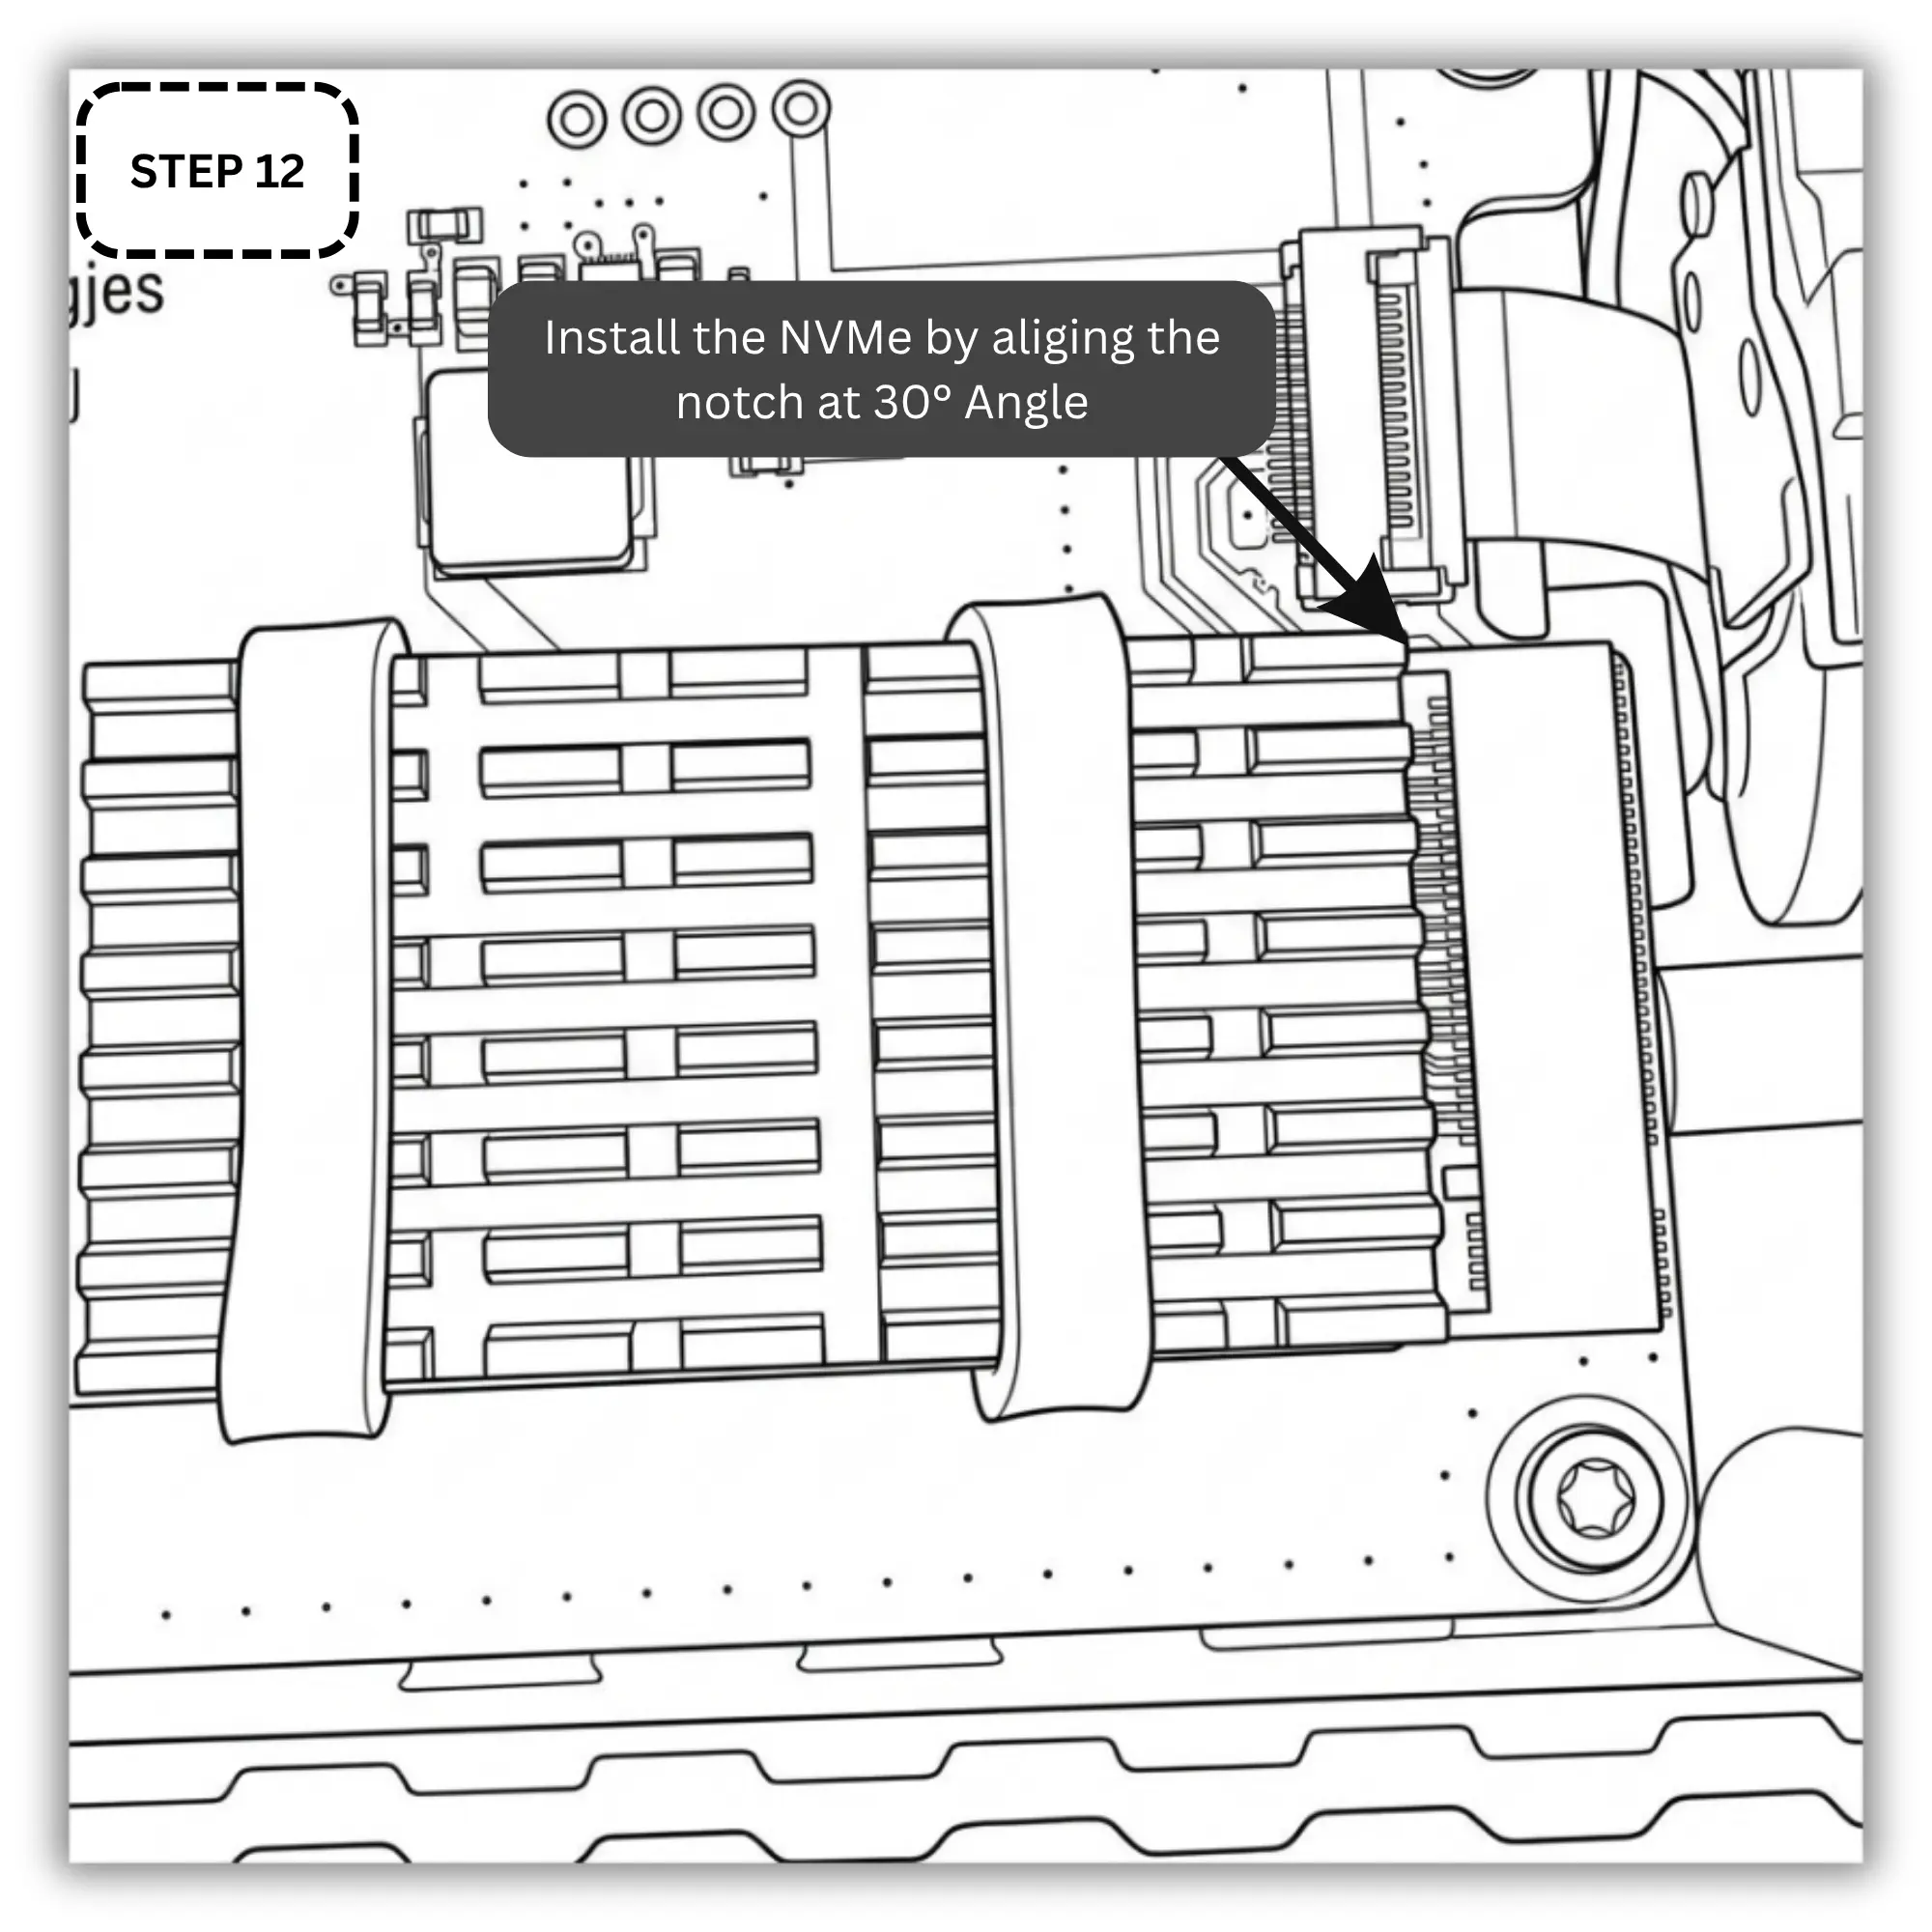
Step 12 – Install NVMe
Insert the rubber-banded NVMe SSD assembly into the PurrfectBackup M.2 slot (NVMe Slot) at a slight 30-degree angle until it is firmly seated.
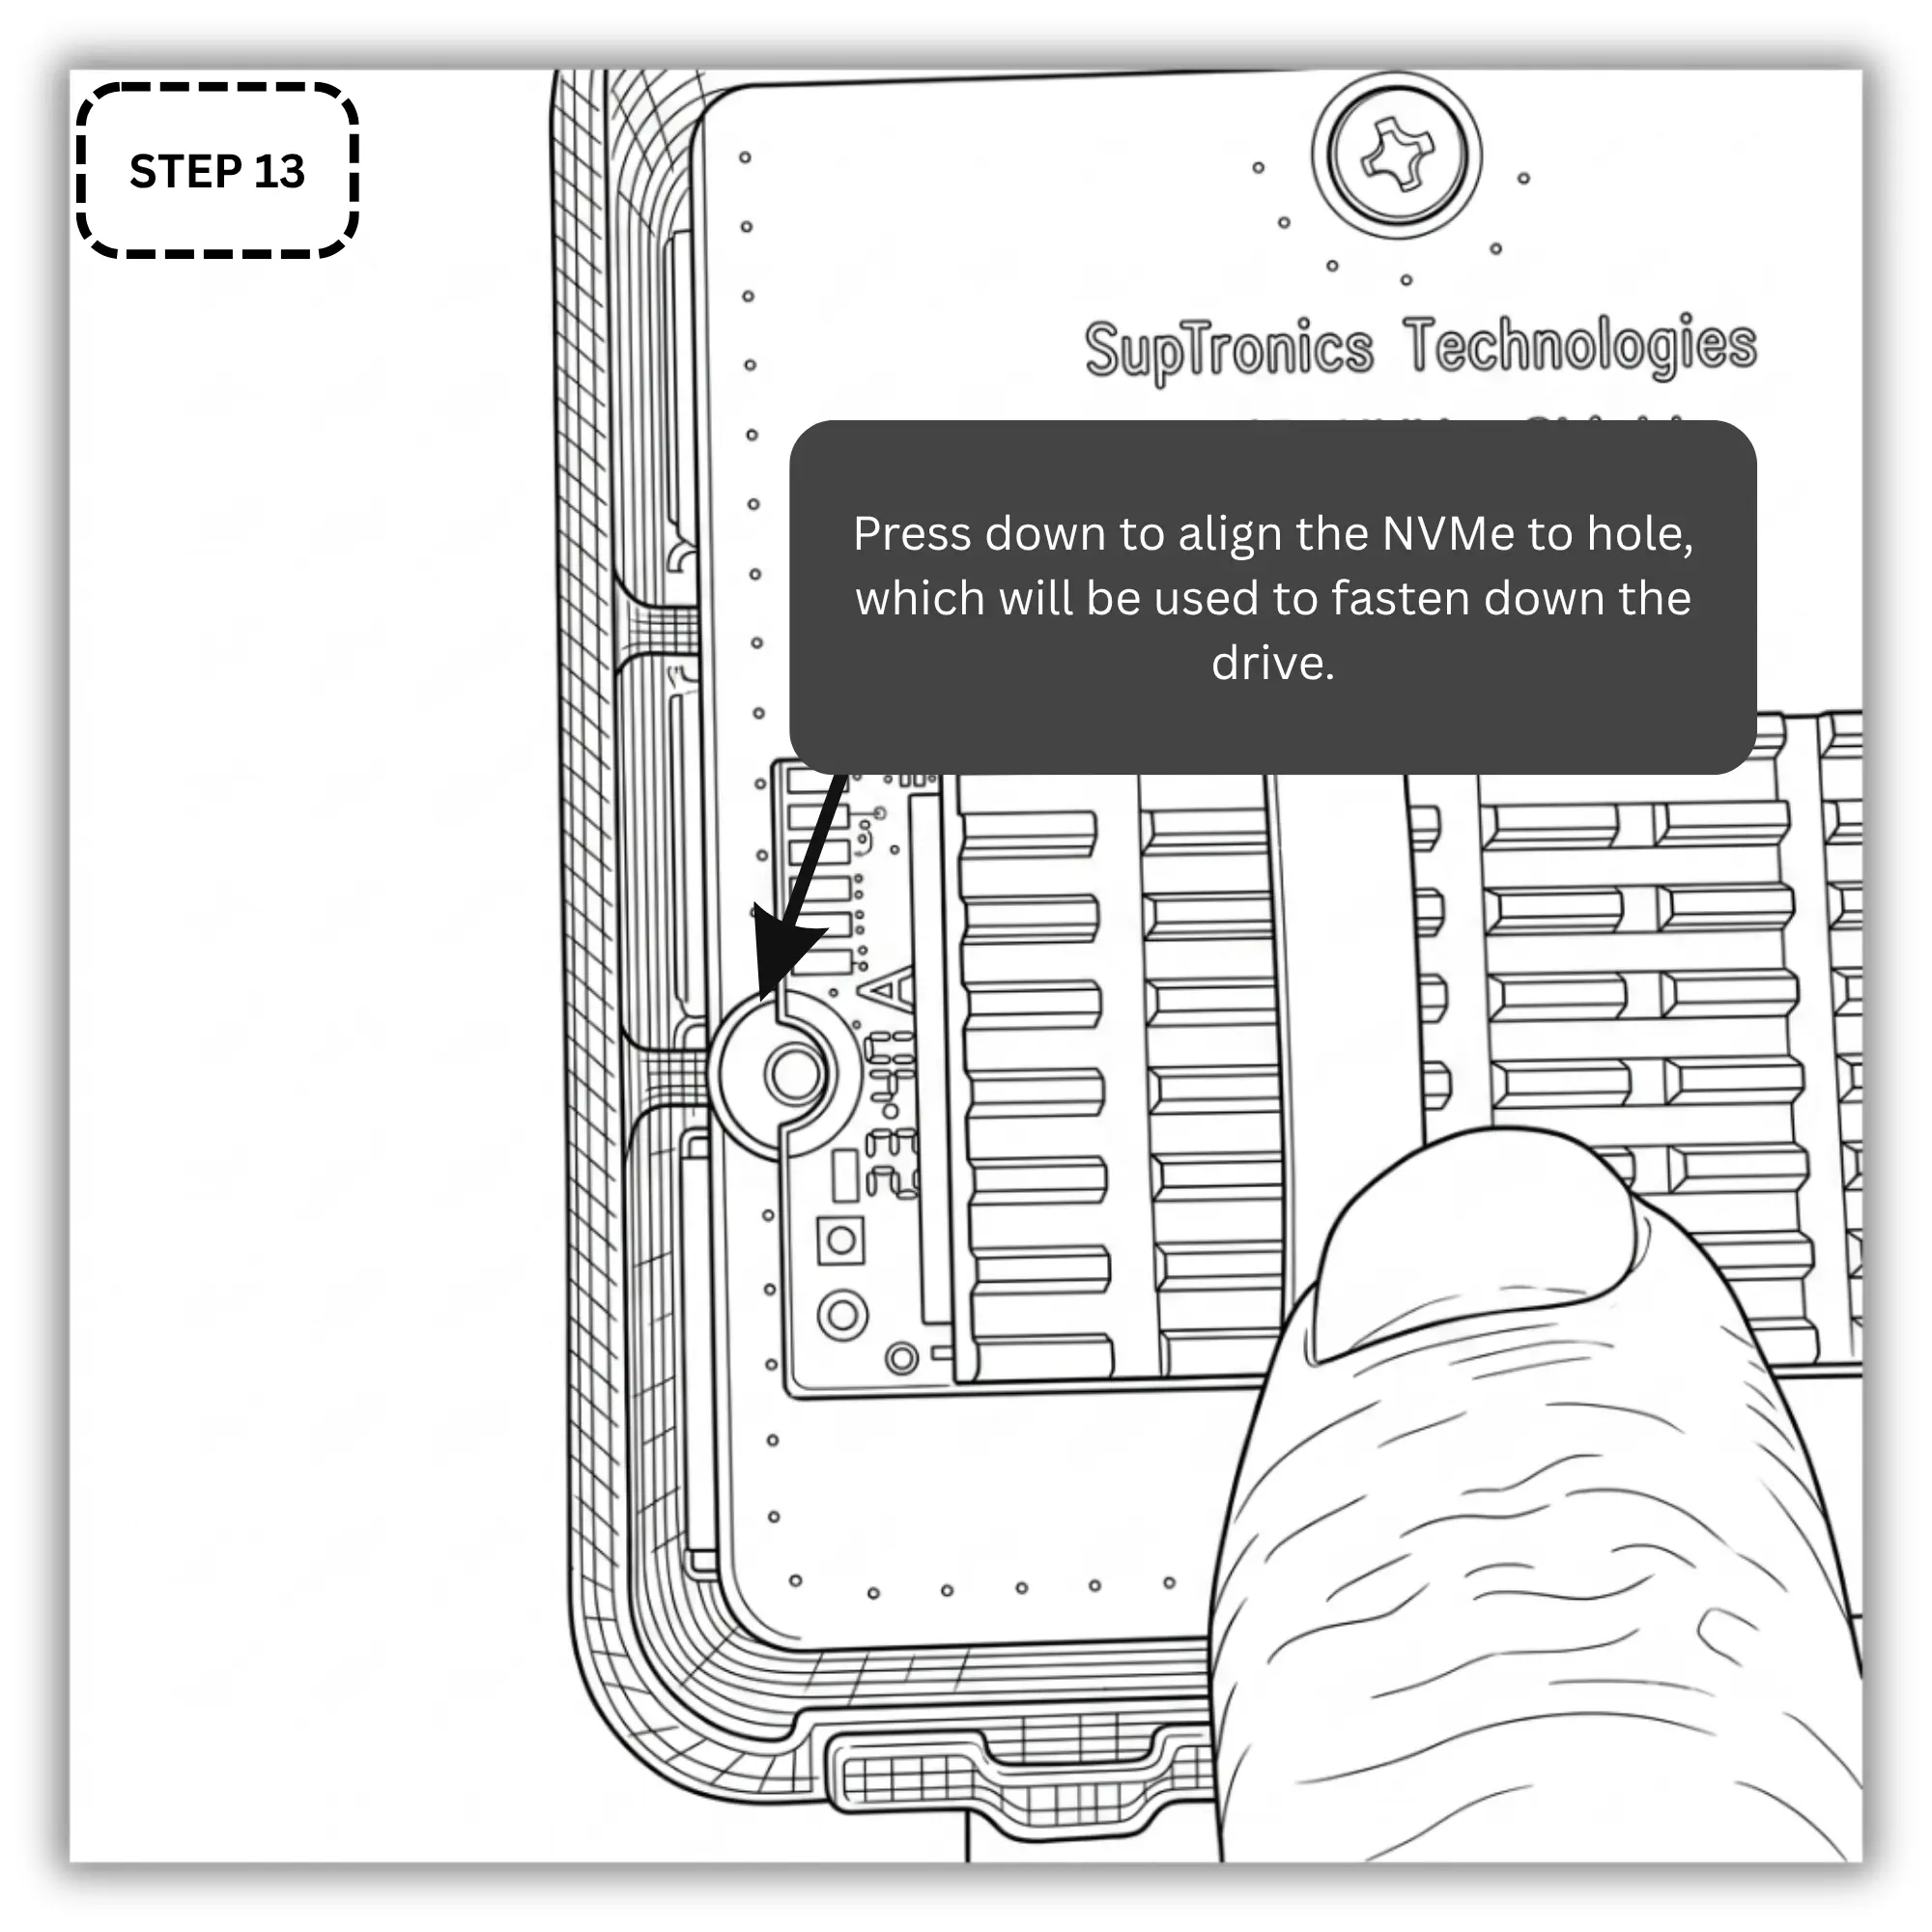
Step 13 – Align NVMe
Press other side of NVMe to align with back screw
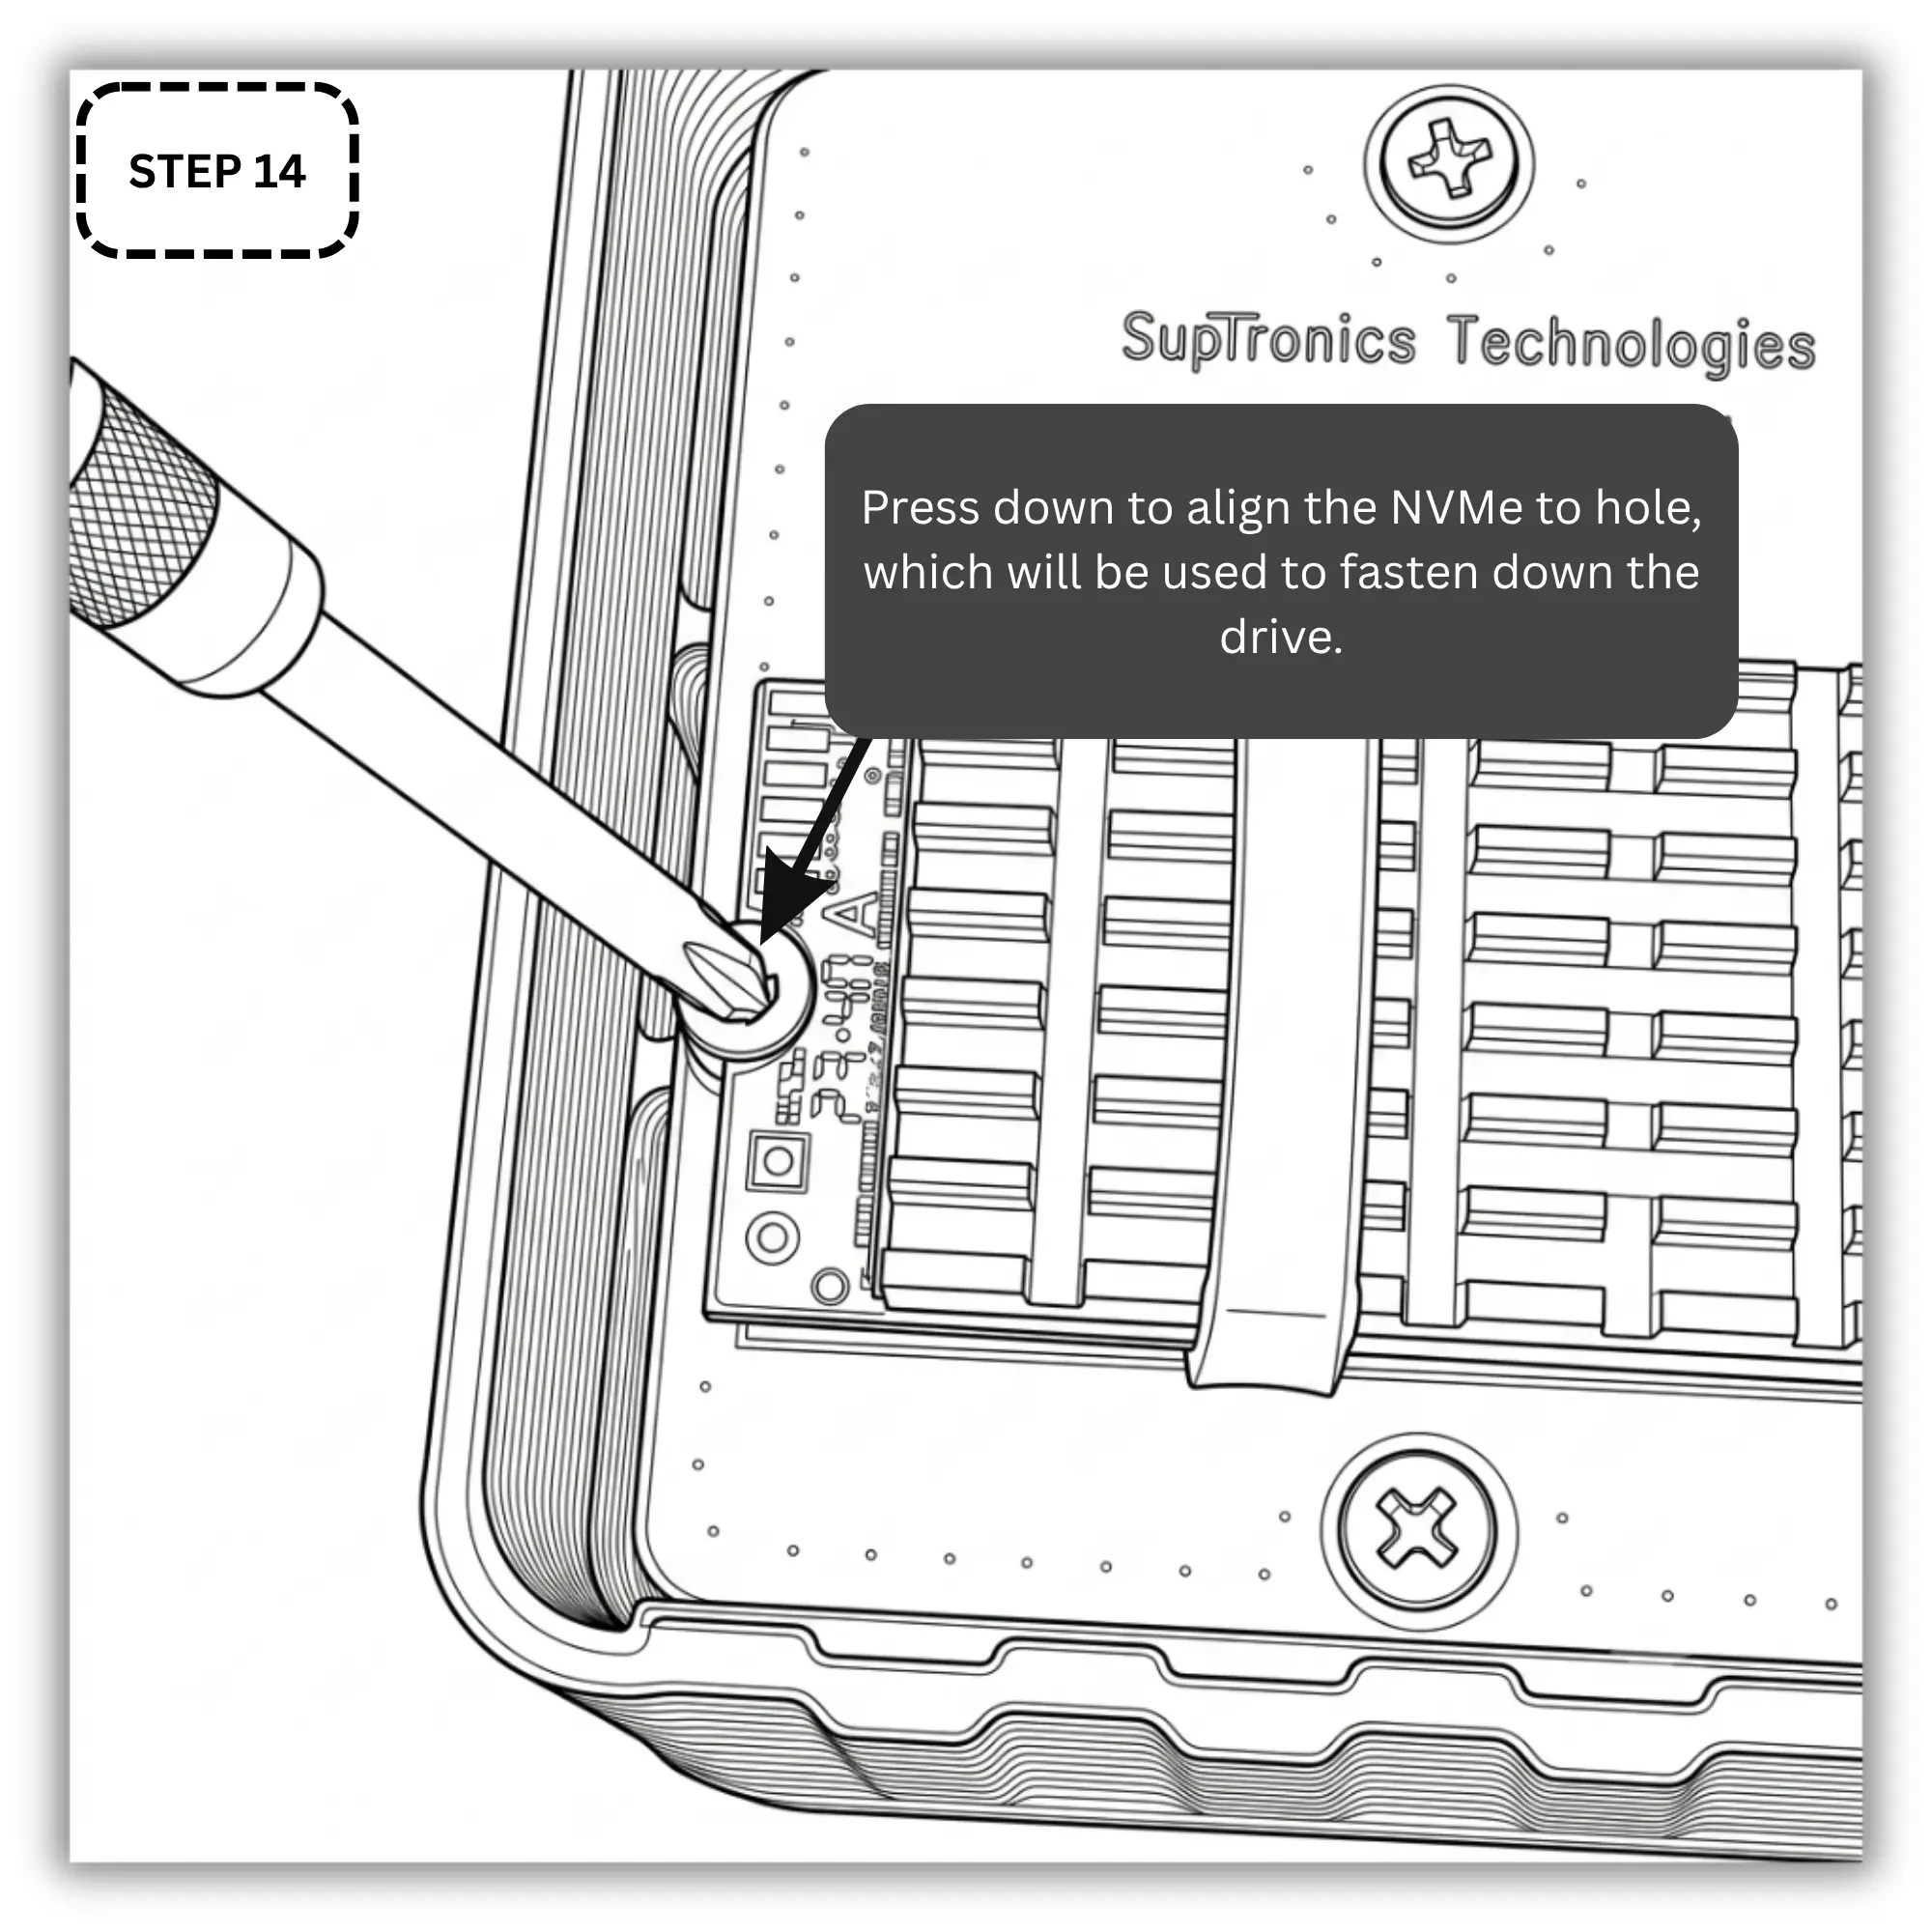
Step 14 – Reattach stand-off screw to NVMe
Secure the back end of the drive to the standoff using the provided small silver screw.
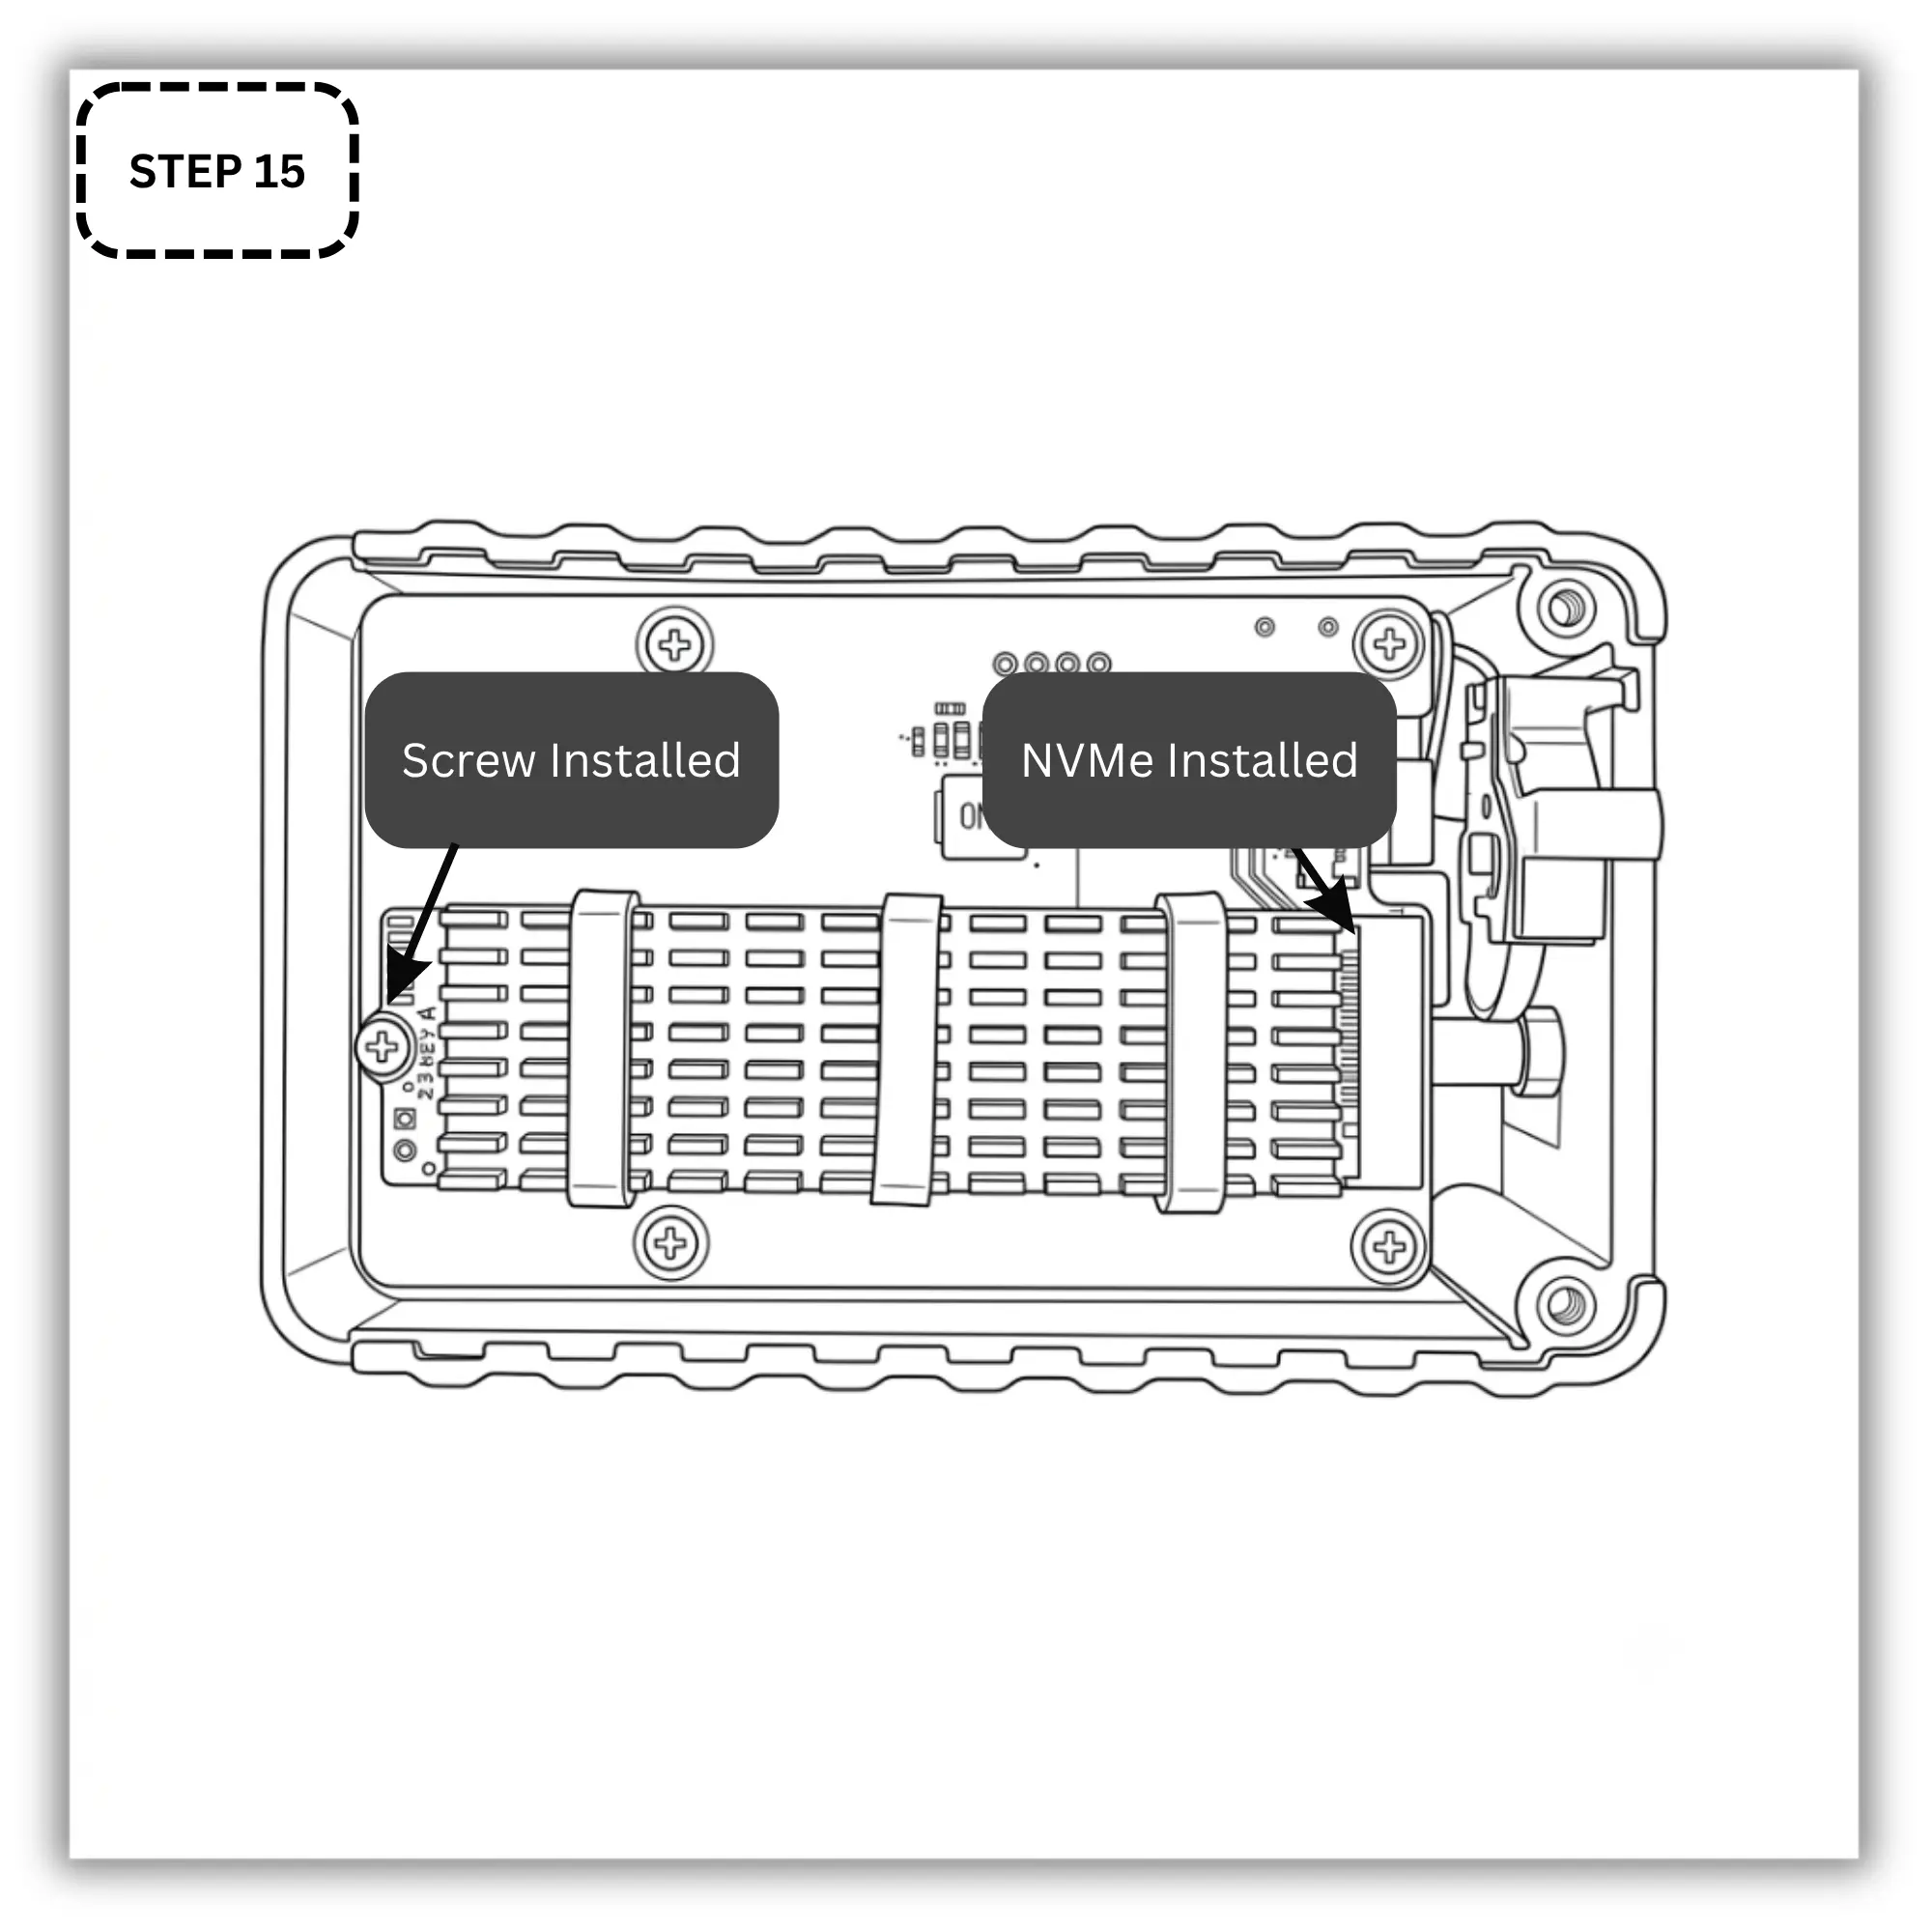
Step 15 – Final Look Inside
This is how it looks like when NVMe is installed
Reassemble the Enclosure
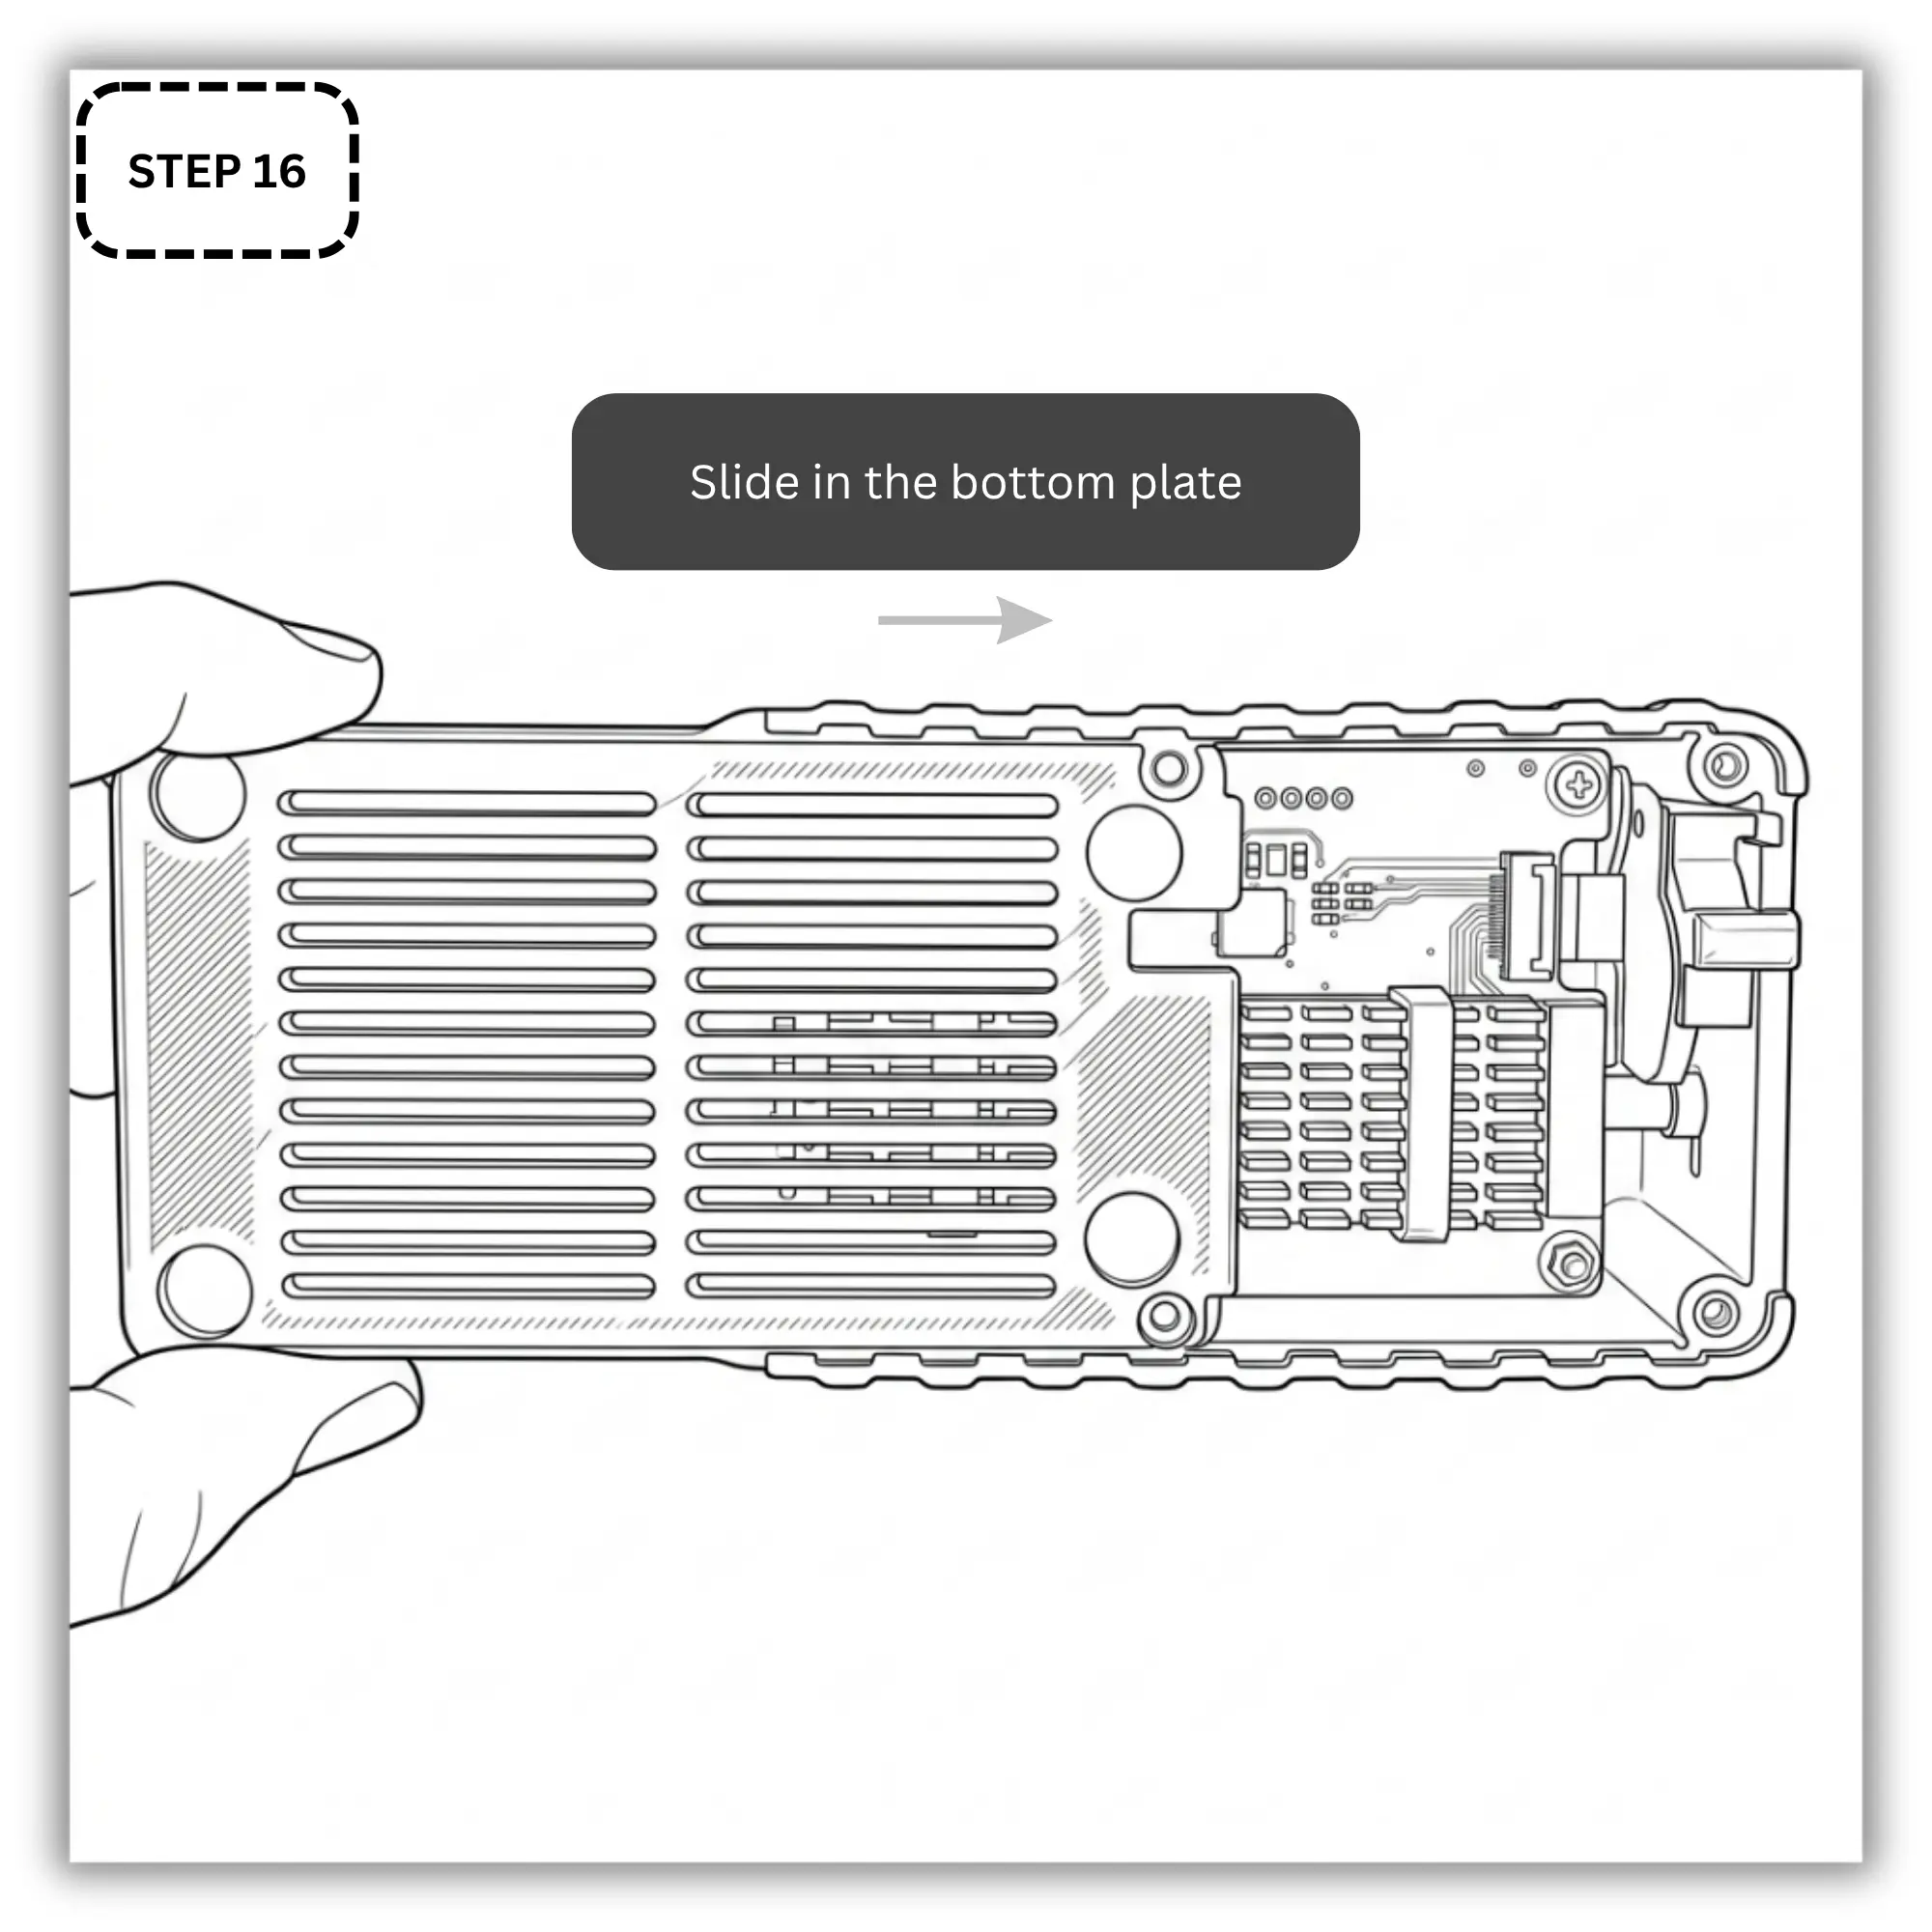
Step 16 – Slid in Bottom plate
Slide the bottom plate back onto the PurrfectBackup PRO housing.
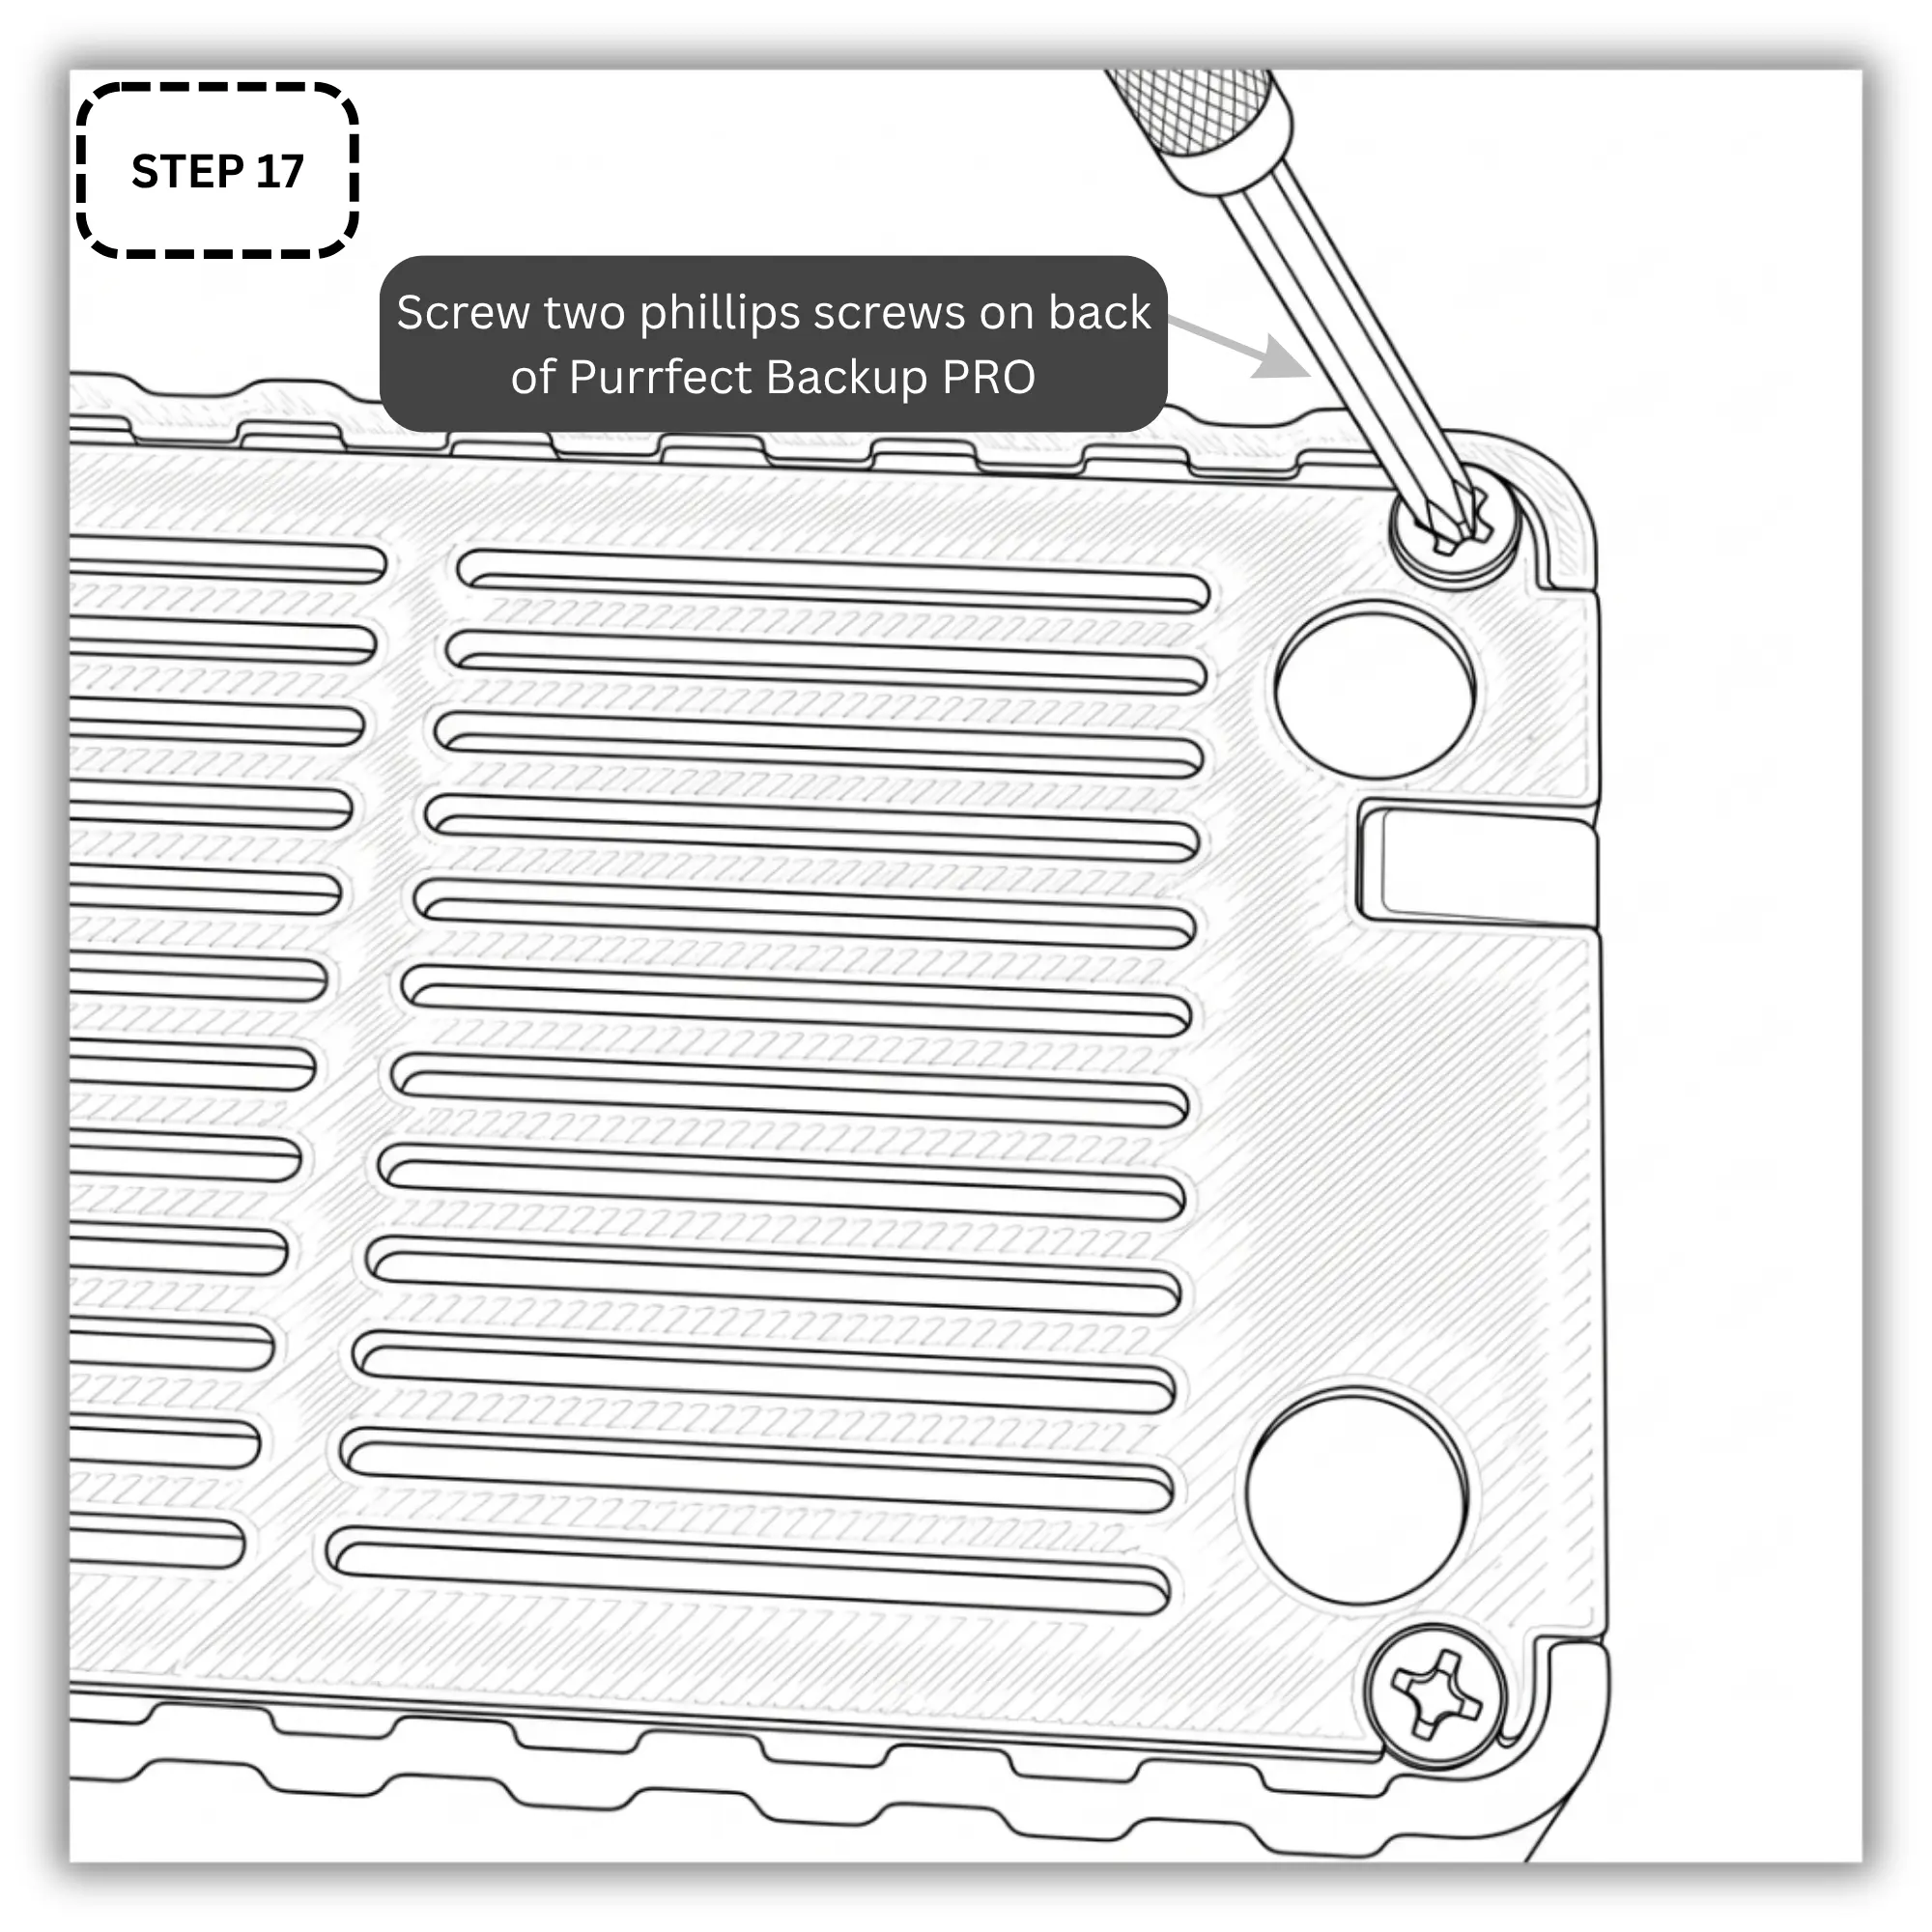
Step 17 – Lock the bottom plate in place
Reinstall and tighten the two Phillips screws at the back to lock the plate in place.
Your high-speed storage expansion is now fully installed and ready to power on!